Soap Dispenser Refill Instructions
Proper soap dispenser refill instructions help prevent no-dispensing problems, leaks, clogs, weak soap output, and sensor-related maintenance issues. Whether your unit uses a refillable reservoir, replaceable cartridge, bottle system, or foam soap refill, correct installation is important for reliable dispensing.
This guide explains how to refill automatic, touchless, and commercial soap dispensers, how to avoid common refill mistakes, and how to test the dispenser after refilling.
Refill Instructions
Cartridge Installation
Liquid & Foam Soap Guidance
Commercial Maintenance Support
|
|
Before Refilling a Soap Dispenser
Before adding soap or installing a new cartridge, inspect the dispenser carefully. Many refill-related problems happen because the wrong soap type is used, the cartridge is not seated correctly, the reservoir is overfilled, or dried soap is left inside the nozzle and pump area.
Check Soap Type
Confirm whether the dispenser is designed for liquid soap, foam soap, sanitizer, or a specific refill cartridge.
Inspect the Reservoir
Look for old soap, residue, cracks, leaks, or contamination before adding fresh soap.
Clean the Nozzle
Dried soap around the outlet can block flow even after the dispenser has been refilled.
Check the Pump Tube
Make sure any internal tube or refill connection is not loose, bent, clogged, or disconnected.
Avoid Overfilling
Overfilling a refillable reservoir can cause leaking, mess inside the housing, or soap reaching electronic parts.
Test After Refilling
After refilling, activate the dispenser several times to prime the pump and confirm proper soap output.
Quick Tip: If your soap dispenser does not dispense after refilling, the pump may need priming. Activate the dispenser several times before assuming the unit is defective.
Step-by-Step Soap Dispenser Refill Instructions
Follow these general refill instructions for automatic and touchless soap dispensers. Exact steps may vary by model, so always follow the dispenser label or product manual when available.
-
Turn off the dispenser if possible.
If your soap dispenser has an on/off button, turn it off before opening the cover. This helps prevent accidental dispensing during refill service.
-
Open the dispenser cover.
Unlock or open the dispenser housing carefully. In commercial dispensers, the cover may require a key or release button.
-
Remove the empty refill or inspect the reservoir.
If the dispenser uses a cartridge or bottle, remove the empty refill. If it uses a refillable tank, check the remaining soap level and inspect for residue or contamination.
-
Clean visible soap buildup.
Wipe the refill area, nozzle, cap, and pump connection with a soft damp cloth. Removing old soap helps prevent clogs and leaks after refilling.
-
Install the correct soap refill.
Insert the compatible cartridge, bottle, or refill bag. Make sure it is firmly seated, locked, or connected to the pump inlet. A loose refill can cause no soap flow or leaking.
-
Fill only to the recommended level.
For refillable reservoirs, pour soap slowly and do not exceed the fill line. Overfilling may cause soap to spill inside the dispenser or leak from the cover.
-
Close the cover securely.
Make sure the dispenser housing, refill door, or battery cover is fully closed. Some automatic soap dispensers will not work if the cover is not properly latched.
-
Turn the dispenser back on.
Restore power if the unit was turned off. Check for indicator lights, sensor response, or blinking warnings.
-
Prime the pump and test the output.
Place your hand under the sensor and activate the dispenser several times. It may take multiple cycles for soap to travel through the pump and reach the nozzle.
Liquid Soap vs Foam Soap Refill Instructions
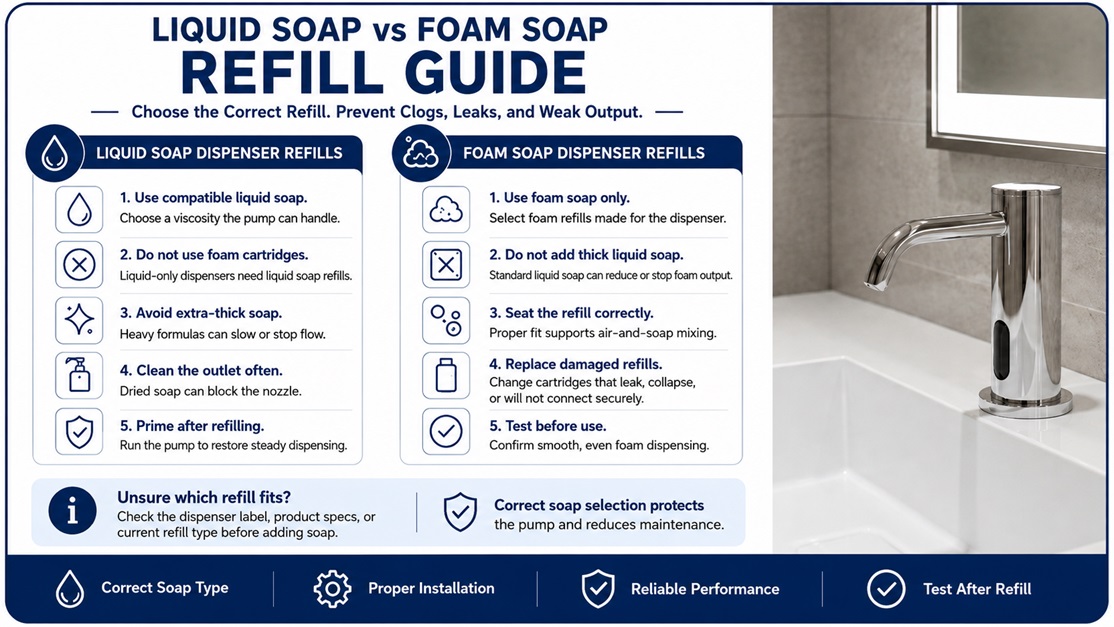
One of the most important refill instructions is to use the correct soap type. Liquid soap dispensers and foam soap dispensers are not always interchangeable. Using the wrong soap can cause weak output, clogging, leaking, or complete dispensing failure.
Liquid Soap Dispenser Refills
- Use liquid soap with a viscosity suitable for the dispenser pump.
- Avoid soap that is too thick unless the dispenser is designed for it.
- Do not use foam soap cartridges in a liquid-only dispenser.
- Clean the nozzle regularly because dried liquid soap can block the outlet.
- Prime the pump after each refill or cartridge replacement.
Foam Soap Dispenser Refills
- Use foam soap or compatible foam refill cartridges only.
- Do not fill a foam dispenser with standard thick liquid soap unless directed by the manufacturer.
- Make sure the foam refill is seated correctly to allow proper air-and-soap mixing.
- Replace damaged cartridges that collapse, leak, or do not connect securely.
- Test the foam output after installation to confirm correct dispensing.
If you are unsure which refill to use, check the dispenser label, product specifications, or existing refill type before adding soap. Correct refill selection helps prevent maintenance issues and protects the pump.
How to Prime the Dispenser After Refilling
After a soap dispenser refill, the pump line may contain air. Until soap moves through the internal tube, the dispenser may activate without releasing soap. This is normal after some refill changes.
- Confirm the refill or reservoir has enough soap.
- Make sure the cartridge, bottle, or cap is connected securely.
- Check that the nozzle is clean and not blocked.
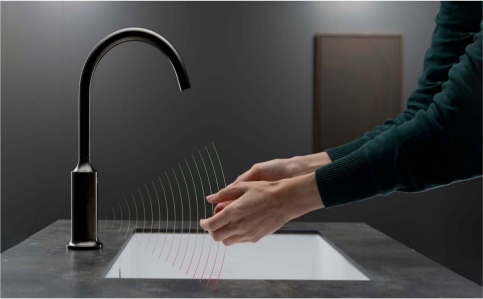
- Place your hand under the sensor to activate the dispenser.
- Repeat the activation several times until soap appears.
- If the motor sounds weak, replace the batteries and test again.
- If soap still does not dispense, inspect the pump tube or refill outlet.
Priming is especially important after a dispenser has been empty, cleaned, stored, or unused for a long time. In commercial restrooms, maintenance staff should test each dispenser after refill service before closing the unit.
Maintenance Tip: Always test the dispenser after refilling. A full dispenser that has not been primed may still appear to be broken if soap has not reached the nozzle.
Common Refill Mistakes to Avoid
Many soap dispenser problems happen immediately after refilling. Avoiding these common mistakes can help prevent leaking, clogging, blinking warning lights, and no soap output.
Refill Mistakes That Cause Problems
- Using liquid soap in a foam-only dispenser.
- Using soap that is too thick for the pump.
- Installing the cartridge loosely or at the wrong angle.
- Forgetting to remove the seal or cap from a new refill.
- Overfilling a refillable reservoir.
- Leaving dried soap around the nozzle.
- Closing the cover before the refill is fully seated.
- Not priming the pump after refill replacement.
- Using contaminated or separated soap.
If the dispenser stops working after refilling, reopen the unit and check the refill connection first. Then clean the nozzle, confirm the soap type, and prime the pump.
Commercial Soap Dispenser Refill Maintenance
Commercial soap dispensers in high-traffic restrooms need consistent refill maintenance. A structured refill routine helps prevent empty dispensers, user complaints, wasted soap, and emergency service calls.
Recommended Commercial Refill Checks
- Check soap levels during routine restroom service.
- Replace low refills before they run completely empty.
- Wipe the nozzle and sensor area during each refill visit.
- Inspect inside the housing for leaks or residue.
- Confirm cartridges are locked into place.
- Test sensor activation after every refill.
- Keep compatible soap refills available for maintenance staff.
- Document repeated dispenser issues for replacement planning.
In offices, schools, healthcare buildings, restaurants, hotels, airports, and public restrooms, reliable refill service supports better hygiene and reduces downtime.
Recommended Automatic Soap Dispenser Solutions
If your current dispenser is difficult to refill, leaks after refilling, or frequently stops dispensing after cartridge replacement, upgrading to a more reliable automatic soap dispenser may reduce maintenance time and improve restroom performance.
For commercial projects, select soap dispensers with easy refill access, secure cartridge placement, dependable sensor operation, compatible soap options, and durable construction for high-traffic environments.
Related Troubleshooting Guides
Refill problems often connect to no soap output, leaking, sensor response, and battery power. Use these related guides if the dispenser does not work properly after refilling.
FAQs
How do I refill a soap dispenser?
Open the dispenser cover, remove the empty refill or inspect the reservoir, clean any soap buildup, install the correct soap refill, close the cover securely, and activate the dispenser several times to prime the pump.
Why is my soap dispenser not working after refilling?
The refill may not be seated correctly, the pump may need priming, the nozzle may be clogged, the soap may be too thick, or the dispenser cover may not be fully closed.
Can I use any soap in an automatic soap dispenser?
No. Use the soap type recommended for your dispenser. Liquid soap, foam soap, and sanitizer may require different pump systems or cartridges.
How do I prime a soap dispenser after refilling?
Place your hand under the sensor and activate the dispenser several times until soap reaches the nozzle. Make sure the refill is full, connected securely, and the nozzle is clean.
Why does my dispenser leak after refilling?
Leaking after refilling may be caused by overfilling, a loose cartridge, damaged cap, cracked reservoir, wrong soap type, or soap spilled inside the housing during refill service.
How often should commercial soap dispensers be refilled?
Refill frequency depends on traffic level, refill capacity, and restroom usage. In high-traffic commercial restrooms, soap levels should be checked during routine maintenance and refilled before empty.
|
|
|