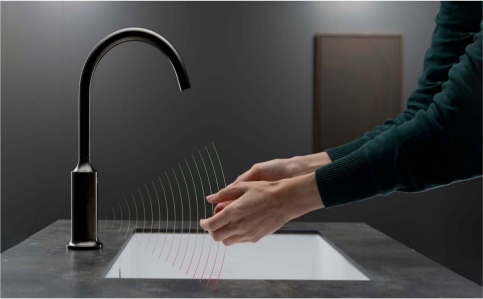
Professional Engineering Guide
Commercial Soap Dispenser Installation, Commissioning & Performance Verification
A technical framework for installation planning, rough-in coordination,
system startup, calibration, acceptance testing and documented verification
of commercial automatic soap dispensing systems.
Installation Engineering
Installation Is Only the First Stage
A commercial automatic soap dispenser is not complete when the
dispenser body has been secured to the countertop or wall. The system
must also be connected, primed, calibrated, tested and documented
under the final project conditions.
Fontana Soap Dispensers
®
should be installed as coordinated electromechanical systems that
include the dispenser outlet, sensor, pump, fluid tubing, reservoir,
controller, power supply and accessible service area.
Errors in mounting position, tubing routing, power coordination or
service access may not become obvious until the sink, counter,
cabinetry and surrounding fixtures are fully installed. For this
reason, installation planning must begin during design and submittal
review rather than after the countertop arrives.
The completed system should be verified for activation stability,
calibrated dose, response time, anti-drip behavior, power condition,
false-trigger resistance and maintainability before project acceptance.
Project Responsibilities
Four Disciplines Control Installation Success
Architecture
Countertop, basin, wall, accessibility and finish coordination
Plumbing
Fixture layout, service space, reservoir and tubing routing
Electrical
Low-voltage power, transformers, outlets and cable pathways
Commissioning
Calibration, functional testing, records and final acceptance
Why Commissioning Matters
A Mounted Dispenser Is Not Necessarily an Operational System
Installation establishes the physical assembly. Commissioning verifies that
the completed assembly performs as intended under actual operating
conditions. These are separate responsibilities.
A dispenser may appear correctly installed while the sensor field intersects
the basin, the tubing contains air, the pump dose is uncalibrated or the
battery voltage falls below the required level when the motor starts.
Commissioning identifies these conditions before the restroom is placed into
full service. It also creates baseline records that can later distinguish
normal maintenance needs from installation defects or component degradation.
Commercial project teams can apply broader commissioning principles from
organizations such as the
Building Commissioning Association
and
ASHRAE standards and guidelines,
while following the product-specific procedures for the scheduled dispensing
system.
Core Principle:
Installation establishes the equipment. Commissioning proves the installed
system can operate reliably, repeatedly and safely within the completed
restroom environment.
Performance Outcomes
What Final Verification Should Establish
Correct Activation
The sensor detects intentional hand placement without requiring
contact or repeated searching.
Controlled Delivery
The pump provides a repeatable soap dose using the approved
formulation.
Stable Reset
One hand entry produces one controlled dispensing cycle without
unintended repetition.
Reliable Power
The controller and pump receive stable power during standby and
full-load operation.
Accessible Service
Reservoirs, batteries, pumps and controllers remain reachable for
routine maintenance.
Documented Baseline
Final settings, measured results and installed model information are
recorded for facility use.
Preinstallation Planning
Information Required Before Rough-In Begins
The installation team should not rely solely on the exterior product image.
The complete rough-in must be based on the approved model, dimensional
drawing, power architecture, pump assembly, reservoir type and service-access
requirements.
Approved product model and complete model number
Dimensioned installation and rough-in drawings
Mounting-hole diameter and allowable deck thickness
Soap outlet reach and sensor direction
Pump, controller and reservoir dimensions
Minimum under-counter or wall-cavity clearance
Tubing length, size and routing limitations
Battery, transformer or hybrid power requirements
Approved liquid or foam soap formulation
Accessibility and operable-part coordination
Required certifications and project submittals
Replacement parts and maintenance documentation
Do not drill the countertop from a catalog image.
Use the approved model-specific installation drawing and verify the final
basin, faucet, counter and concealed components before fabrication.
Coordination Requirement
Review One Complete Wash Station
The basin, faucet, soap dispenser, sensor fields, drain, plumbing,
cabinetry, power and service components should appear on one coordinated
installation drawing.
Drawing Review
Architectural, Plumbing and Electrical Coordination
|
Drawing Discipline
|
Items to Verify
|
Common Coordination Failure
|
|
Architectural Plans
|
Lavatory count, accessible fixture location, partitions,
counter dimensions and restroom circulation
|
Dispenser positioned beyond the intended user approach
|
|
Interior Elevations
|
Mounting height, wall finish, mirror, accessories and visual
alignment
|
Wall-mounted outlet conflicts with mirror or backsplash
|
|
Countertop Shop Drawings
|
Hole locations, basin cutout, edge distance, faucet spacing and
deck thickness
|
Insufficient material between drilled openings
|
|
Plumbing Plans
|
Water supplies, drains, valves, traps, soap components and
service access
|
Pump or reservoir blocked by trap or supply piping
|
|
Electrical Plans
|
Power source, transformer, receptacle, low-voltage routing and
circuit responsibility
|
No accessible or approved power location after casework installation
|
|
Millwork Drawings
|
Cabinet frames, drawers, access doors, shelves and removable panels
|
Cabinet partition occupies the required pump location
|
|
Reflected Ceiling Plans
|
Lighting, daylight exposure and illuminated mirror systems
|
Unanticipated bright light affects the optical sensor environment
|
Countertop Coordination
Verify the Basin Before Locating the Dispenser
The dispenser outlet should deliver soap into the usable basin area while
allowing the user to place a hand beneath the nozzle without touching the
counter or interfering with the faucet.
The mounting location must account for basin rim width, bowl curvature,
counter edge distance, backsplash depth and the position of the faucet,
drain and overflow.
A position that appears correct in plan may fail in section. The outlet may
stop short of the basin, the sensor may point toward the rim or the threaded
shank may collide with the basin flange beneath the counter.
For integrated or coordinated Fontana Touchless Faucet and Soap Dispenser
Sets
®, both fixtures
should be dimensioned from the same basin reference points.
Basin Geometry
Plan, Elevation and Section Verification
|
View
|
Required Verification
|
Performance Impact
|
|
Plan View
|
Dispenser-to-faucet spacing, basin centerline, edge distance and
user hand path
|
Prevents fixture interference and awkward operation
|
|
Front Elevation
|
Outlet height, alignment, accessible reach and visual coordination
|
Supports consistent use and architectural appearance
|
|
Side Section
|
Spout reach, sensor angle, deck thickness and concealed component
clearance
|
Prevents soap delivery onto the counter or basin rim
|
|
Under-Counter View
|
Shank, mounting hardware, pump, tubing, trap and cabinet structure
|
Maintains installation and service access
|
Recommended Submittal:
Provide a coordinated wash-station detail showing the soap outlet, faucet,
basin, sensor direction, mounting hardware and all concealed service
components.
Deck-Mounted Systems
Deck-Mount Installation Engineering
Deck-mounted automatic soap dispensers typically use a threaded shank,
mounting washer, retaining nut and concealed fluid connection beneath the
counter. The mounting assembly must fit within the available space without
contacting the basin flange or cabinet structure.
The countertop opening should be drilled to the model-specific diameter.
Oversized openings can reduce clamping stability, while undersized openings
can damage the finish or prevent proper insertion.
The mounting surface should be flat, structurally sound and compatible with
the required gasket or sealing method. Excess sealant should not enter the
sensor window, threaded shank or fluid connection.
The dispenser should be secured against rotation while avoiding excessive
torque that could distort the mounting washer, crack brittle stone or damage
the dispenser body.
Deck-Mount Verification
Critical Countertop Installation Checks
Verify the approved mounting-hole diameter.
Confirm the actual countertop thickness.
Check edge distance from the basin cutout.
Confirm the shank clears the basin flange.
Verify space for the washer and retaining nut.
Protect the finish during tightening.
Align the outlet toward the intended hand position.
Confirm the body cannot rotate after installation.
Keep sealant away from optical and fluid openings.
Inspect stone or solid-surface material for cracking.
Wall-Mounted Systems
Wall-Mount Installation Engineering
Wall-mounted automatic dispensers require coordinated blocking, outlet
projection, concealed tubing, power routing and access to the control
components behind the finished surface.
The rough-in location should be measured from the finished wall and finished
floor rather than unfinished framing. Tile, stone panels, backing material
and adhesive can alter the final projection.
The installer must verify that the outlet projects far enough to deliver soap
inside the basin without creating an excessive reach that encourages
tampering or accidental impact.
Service panels should remain accessible after mirrors, millwork and wall
accessories are installed. A concealed controller that can only be reached by
removing finished stone does not meet practical commercial maintenance needs.
Wall Rough-In
Wall-Mounted Coordination Requirements
|
Installation Element
|
Required Coordination
|
Failure Risk
|
|
Structural Blocking
|
Locate rigid support at the approved mounting points
|
Loose fixture, rotation or wall-surface damage
|
|
Finished-Wall Depth
|
Include substrate, waterproofing, tile or stone thickness
|
Incorrect outlet projection
|
|
Fluid Path
|
Provide protected tubing route without crushing or sharp bends
|
Restricted soap flow or hidden leakage
|
|
Power Route
|
Separate and protect approved low-voltage wiring
|
Connector damage or electrical interference
|
|
Service Panel
|
Locate for pump, controller and reservoir access
|
Destructive maintenance
|
|
Mirror and Backsplash
|
Coordinate edges, seams and installation sequence
|
Blocked fasteners or inaccessible trim
|
Accessibility Coordination
Install the Activation Point Within the Accessible Use Zone
Touchless operation reduces the need to grasp or apply force, but it does not
automatically establish an accessible installation. The user's hand must be
able to enter the sensor field from the required clear floor space and
approach.
The dispenser position should be coordinated with the accessible lavatory,
basin projection, counter edge and permitted reach range. The activation
point—not only the exterior dispenser body—should be reviewed.
Project teams should verify the applicable provisions of the
2010 ADA Standards for Accessible Design
and the adopted
ICC A117.1 accessibility standard.
Common Error:
A dispenser can be mounted at an apparently acceptable height while the basin
or counter prevents an accessible user from reaching the actual detection
zone.
MultiFeed Planning
Central Soap Distribution Requires Early Coordination
Fontana MultiFeed
®
systems can supply multiple dispensing outlets from a central reservoir and
pump arrangement. This can reduce fixture-by-fixture refill labor in
high-traffic commercial restrooms.
The central architecture must be planned before walls, counters and
casework are closed. The design should identify the reservoir location,
pump location, tubing routes, branch connections, isolation points, service
access and power source.
Tubing length, elevation difference and branch configuration can influence
priming time, pressure loss and outlet response. Long or poorly balanced
branches may produce unequal time-to-soap between dispensers.
Central components should be positioned so facility personnel can refill,
inspect, isolate, reprime and replace them without entering inaccessible wall
or ceiling cavities.
MultiFeed Design Review
Required Central-System Decisions
Number of dispensers served by each zone
Central reservoir volume and usable capacity
Pump duty, redundancy and replacement access
Maximum branch length and elevation difference
Main and branch tubing dimensions
Branch balancing and outlet calibration method
Isolation valves or service disconnect points
Priming and trapped-air removal procedure
Low-level monitoring and alarm routing
Backup power or pump-failure strategy
Leak containment and component protection
Access for reservoir cleaning and replacement
Power Planning
Select and Coordinate Power Before Construction
The dispenser power architecture affects rough-in, service access and
lifecycle maintenance. Battery systems require accessible battery
compartments, while hardwired systems require approved transformers,
receptacles or low-voltage pathways.
Hybrid systems may use hardwired power during normal operation with battery
backup during an outage. The installation documents should identify which
source is primary, how transfer occurs and how each source is tested.
Power components should not be placed where leaks, condensation or routine
refilling can expose them to soap or water. Controllers and transformers
should be mounted securely rather than left loose on the cabinet floor.
All electrical work should follow the approved product documentation,
applicable listing requirements and the adopted electrical code.
Power Architecture
Battery, Hardwired and Hybrid Installation Requirements
|
Power Type
|
Installation Requirement
|
Commissioning Requirement
|
|
Battery
|
Accessible battery holder, correct polarity and protected
connection
|
Measure voltage at rest and during pump operation
|
|
Hardwired DC
|
Approved transformer, cable route, connector and accessible
disconnect
|
Verify output voltage, polarity and loaded operation
|
|
AC/DC Hybrid
|
Primary supply, backup battery and automatic transfer arrangement
|
Test both sources and simulated primary-power loss
|
|
Compatible PoE
|
Purpose-designed interface, compatible network equipment and
approved cable route
|
Verify power classification, communication and fallback behavior
|
Power Verification:
Open-circuit voltage alone is insufficient. Measure the supply while the pump
is operating because weak batteries and undersized power supplies may show
acceptable voltage until a load is applied.
Electrical Coordination
Protect Low-Voltage Wiring and Connections
Low-voltage cables should be routed away from sharp edges, moving cabinet
parts, hot surfaces and locations where soap containers may press against
them. Cables should not be used to support the controller or transformer.
Connectors should remain accessible for testing and replacement but protected
from direct splash, leaks and cleaning chemicals. Excess cable should be
secured without creating tight coils that obstruct service access.
Where electrical interference is possible, signal cables should be separated
from higher-voltage conductors and noise-producing equipment according to the
product documentation and applicable electrical practices.
The
NFPA electrical resources
provide general electrical-safety context. Final installation must follow the
adopted code, approved equipment and authority-having-jurisdiction requirements.
Rough-In Matrix
Preconstruction Coordination Checklist
|
Coordination Item
|
Responsible Trade or Team
|
Required Verification
|
Hold Point
|
|
Dispenser Location
|
Architect and plumbing engineer
|
Basin relationship, accessibility and fixture spacing
|
Before countertop fabrication
|
|
Mounting Opening
|
Countertop fabricator
|
Model-specific diameter and edge clearance
|
Before drilling
|
|
Wall Blocking
|
General contractor
|
Size, location and final-wall depth
|
Before wall closure
|
|
Power Source
|
Electrical contractor
|
Voltage, accessibility, listing and protection
|
Before casework closure
|
|
Reservoir Location
|
Plumbing contractor and facility team
|
Capacity, refill access and spill containment
|
Before cabinet fabrication
|
|
Tubing Route
|
Plumbing contractor
|
Length, bend radius, protection and identification
|
Before wall or chase closure
|
|
Service Access
|
Architect and general contractor
|
Access panels, cabinet doors and removable components
|
Before finish installation
|
|
Final Commissioning
|
Installer, commissioning agent and owner
|
Functional testing, records and staff training
|
Before project acceptance
|
Installation Sequence
Recommended Project Installation Workflow
1
Confirm Approved Equipment
Verify model numbers, finishes, power architecture, reservoir type,
soap format and all required accessories before rough-in.
2
Coordinate the Wash Station
Review the dispenser, faucet, basin, countertop, drain, cabinetry,
power and service areas on coordinated drawings.
3
Complete Rough-In
Install blocking, access panels, tubing pathways, approved power and
reservoir support before closure of walls and casework.
4
Verify Finished Conditions
Measure the completed counter, wall, basin and cabinet against the
approved installation drawings before drilling or mounting.
5
Install Mechanical Components
Mount the dispenser, pump, reservoir, controller and tubing without
straining connections or blocking service access.
6
Connect and Protect Power
Complete battery, hardwired or hybrid connections using approved
components and protected routing.
7
Prime and Calibrate
Fill the approved soap supply, remove trapped air and adjust the sensor
and pump after the complete installation is operational.
8
Perform Acceptance Testing
Test detection, dose, response, anti-drip behavior, power, false
activation, adjacent-unit interaction and maintenance access.
9
Document and Train
Record final settings and measured results, then provide maintenance
instructions, parts information and staff training.
Part 1 Technical Notice:
All dimensions, mounting requirements, power values, access clearances and
installation procedures must be confirmed from the model-specific Fontana Soap
Dispensers
® technical
documentation. Project drawings, adopted codes, accessibility requirements,
listing conditions and authority-having-jurisdiction requirements govern the
final installation.
```
```html
Reservoir Engineering
Select the Soap Supply Architecture Before Installation
The reservoir determines refill frequency, fluid availability, service
access and the physical space required below the counter or inside the
service area. Individual bottles, bulk-fill containers and centralized
MultiFeed systems create different installation requirements.
Fontana Automatic Soap Dispensers
®
should be installed with the reservoir type identified in the approved
submittal. Substituting a different bottle or container may alter tubing
length, suction height, connector compatibility and pump performance.
The reservoir should remain upright, mechanically stable and protected from
impact. It should not rest against electrical equipment, sharp cabinet
edges, hot-water piping or moving drawers.
The refill opening, cap, pickup tube and level indicator should be reachable
without removing traps, supply lines or permanently installed millwork.
Reservoir Selection
Individual Bottle, Bulk Fill or MultiFeed
|
Reservoir Type
|
Installation Characteristic
|
Primary Advantage
|
Primary Coordination Issue
|
|
Individual Bottle
|
One reservoir serves one dispenser
|
Simple fixture-level isolation and replacement
|
Repeated refill access at every wash station
|
|
Bulk-Fill Reservoir
|
Larger under-counter container serves one dispenser or local group
|
Reduced refill frequency
|
Requires greater cabinet space and spill control
|
|
Central MultiFeed
|
One central supply serves multiple outlets
|
Centralized maintenance and high capacity
|
Requires coordinated distribution, balancing and isolation
|
|
Replaceable Cartridge
|
Sealed product cartridge interfaces with the pump
|
Controlled soap compatibility and clean replacement
|
Requires approved cartridge format and supply continuity
|
Reservoir Placement
Support, Access and Spill Protection
The reservoir should be mounted or supported so it cannot overturn during
refilling, cleaning or cabinet use. Flexible containers may require a
dedicated cradle, bracket or level base.
A refill technician should be able to identify the correct reservoir,
remove the closure, add the approved soap and reconnect the system without
placing stress on tubing or electrical wiring.
Where practical, provide a washable containment tray beneath the reservoir.
This can help control minor spills and prevent soap from contacting cabinet
finishes, power components or adjacent stored supplies.
The reservoir label should identify the compatible soap type, dispenser
served, refill procedure and any dilution restrictions.
Soap Compatibility
Use the Approved Fluid Formulation
The pump, check valves, tubing and nozzle are designed around a defined soap
format and viscosity range. Liquid, foam and gel formulations are not
automatically interchangeable.
Using soap that is too viscous can increase motor load, delay delivery and
prevent complete priming. Soap that is too thin may leak, drip or produce an
inconsistent dose.
Foam systems require the correct interaction between liquid concentrate,
air intake, mixing chamber and outlet geometry. Substituting ordinary liquid
soap may prevent proper foam generation and damage the dispensing assembly.
Installation Verification:
Record the exact soap manufacturer, product name, format and formulation
used during commissioning. Changing the soap later can change system
performance even when the hardware remains unchanged.
Tubing Installation
The Fluid Path Controls Priming and Delivery
The soap tube connects the reservoir, pump and dispenser outlet. Its
internal diameter, length, flexibility, elevation and routing affect
priming time, pressure loss and response.
Tubing should be routed in smooth, supported paths without kinks, crushing,
unnecessary loops or sharp changes in direction. It should not be stretched
tight between components.
Excessive tubing length increases the volume that must be primed and may
delay soap delivery after maintenance. Tubing should be cut only when
permitted by the model-specific installation instructions.
All tubing ends should be cut cleanly and inserted fully into the approved
connectors. Damaged, distorted or contaminated tubing ends should not be
reused.
Tubing Routing
Bend Radius, Support and Protection
Avoid Kinks
Tight bends can restrict flow, increase pump load and create
intermittent delivery.
Avoid Low Loops
Unnecessary loops can trap air, collect residue and complicate
priming.
Protect from Compression
Cabinet doors, drawers, fasteners and stored supplies must not pinch
the tubing.
Support Long Runs
Distributed supports reduce sagging, movement and stress at
connectors.
Separate from Heat
Keep tubing away from hot-water piping, transformers and other heat
sources.
Label Every Branch
Multi-dispenser systems should identify the fixture served at both
ends of each line.
Tubing Connections
Prevent Air Entry and Fluid Leakage
A loose suction-side connection can admit air without producing an obvious
soap leak. The pump may run, but the line will fail to prime or will deliver
intermittent air pockets.
Pressure-side connections may leak only while the pump is operating.
Commissioning should therefore include inspection during repeated activation,
not only while the system is idle.
Push-fit connectors should be verified for full insertion and proper tube
engagement. Barbed fittings should use the approved tube size and any
required clamp or retaining device.
Thread sealant should be used only where specified. Sealant must not enter
the soap path because it can obstruct check valves, pump chambers or nozzle
openings.
Vertical Lift
Reservoir Elevation Affects Pump Performance
The vertical distance between the soap level and the pump inlet affects the
suction work required during priming and normal operation.
A reservoir positioned significantly below the pump may increase priming
time and make air leakage more critical. A reservoir positioned above the
pump can create gravity pressure that may increase leakage or dripping if
the system is not designed for that arrangement.
The allowable suction lift and discharge elevation should be confirmed from
the model-specific documentation. Central systems should evaluate the
highest, lowest, longest and shortest branches.
Performance Check:
Do not commission only the dispenser closest to the reservoir. Verify the
most hydraulically demanding outlet as well as representative intermediate
branches.
Pump Placement
Mount the Pump for Stable Operation and Service
The pump should be mounted in the orientation specified by the manufacturer.
Incorrect orientation can trap air, affect check-valve operation or allow
soap to reach portions of the assembly not designed for continuous fluid
exposure.
The mounting surface should be rigid enough to prevent vibration and noise.
The pump should not hang from tubing, wiring or connectors.
Service personnel should be able to disconnect the inlet, outlet and power
connection without removing the basin or dismantling unrelated plumbing.
The pump should remain protected from direct splash and refill spills while
remaining visible enough for inspection.
Pump Installation
Pump-Mounting Verification Checklist
Confirm the approved pump orientation.
Use a rigid mounting surface.
Keep the pump clear of standing water.
Protect the pump from refill spills.
Provide access to all connectors.
Do not support the pump with tubing.
Allow space for removal and replacement.
Verify vibration does not contact cabinetry.
Identify inlet and outlet direction.
Label the dispenser or branch served.
Pump Types
Match Pump Architecture to Soap Format
|
Pump Architecture
|
Typical Function
|
Installation Concern
|
Verification Focus
|
|
Peristaltic Pump
|
Moves fluid by compressing flexible tubing
|
Tube condition, roller alignment and mounting orientation
|
Dose consistency and tubing recovery
|
|
Diaphragm Pump
|
Uses a flexible diaphragm and check valves
|
Air sealing, valve cleanliness and fluid compatibility
|
Priming, pressure and leak resistance
|
|
Gear or Rotary Pump
|
Uses rotating components to move fluid
|
Viscosity, contamination and motor load
|
Flow stability and current draw
|
|
Foam Mixing Pump
|
Coordinates liquid and air delivery
|
Air intake, soap ratio and mixing chamber
|
Foam texture, volume and outlet stability
|
Controller Placement
Mount the Electronics Above Potential Leak Paths
The controller should be secured in a dry, accessible location above the
cabinet floor and away from reservoir openings, tubing joints and drain
connections.
Loose controllers can be damaged by stored supplies, cleaning equipment or
moving cabinet doors. They can also place strain on sensor, pump and power
connections.
The mounting position should allow visual access to indicators, labels,
adjustment controls and connectors. If programming or calibration requires
access to buttons, switches or ports, those features should remain reachable.
Cable entries should face or route according to the specified enclosure
orientation so water cannot collect around connectors.
Controller Connections
Separate Sensor, Pump and Power Circuits
Connectors may appear similar while serving different functions. Each cable
should be identified before connection, especially where multiple identical
fixtures are installed in one cabinet.
Do not force keyed connectors. Incorrect insertion can bend pins, damage
seals or place voltage on the wrong circuit.
Where the controller provides separate ports for sensor input, pump output,
power, level monitoring or communication, each cable should be routed and
labeled independently.
|
Connection
|
Installation Verification
|
Common Failure
|
|
Sensor Input
|
Correct port, full seating and undamaged cable
|
No activation or intermittent detection
|
|
Pump Output
|
Correct polarity or keyed connection
|
Pump does not run or runs incorrectly
|
|
Power Input
|
Approved voltage, polarity and connector
|
Controller damage or unstable operation
|
|
Level Sensor
|
Correct reservoir and configured input
|
False low-level or no alarm
|
|
Communication
|
Correct network, address and termination
|
Missing usage data or fault reporting
|
Sensor Positioning
Verify the Optical Field After Final Mounting
The sensor must detect the user's hand while rejecting the basin, counter,
faucet stream and nearby activity. This can only be verified after the
dispenser is installed in its final position.
A deck-mounted unit should be aligned so the sensor field points toward the
expected hand location rather than the basin rim or polished drain.
A wall-mounted sensor should be checked after final trim installation
because outlet projection and wall-finish thickness can change the detection
angle.
The sensor window should remain unobstructed by sealant, protective film,
trim rings or decorative covers.
Sensor Installation
Initial Optical Verification
Remove protective film from the sensor window.
Clean and dry the final basin and counter.
Confirm the sensor points toward the hand path.
Check whether the basin rim enters the field.
Check the polished drain and faucet reflections.
Run the faucet while observing the sensor.
Operate adjacent dispensers simultaneously.
Test under all permanent lighting.
Confirm sealant does not cover the optical window.
Verify the sensor cable is not strained.
Cable Management
Protect Signal and Power Wiring from Service Damage
Sensor and power cables should follow controlled routes that remain clear
of trap removal, reservoir refilling, access doors and maintenance tools.
Cables should be supported with approved clips or ties without being
over-tightened. Excessive compression can damage insulation or conductors.
Service loops should be long enough to permit component removal but not so
large that they hang into wet areas or obstruct plumbing access.
Where several dispensers share one cabinet or service chase, label both ends
of every sensor, pump, power and communication cable.
Electrical Noise
Reduce Electromagnetic Interference
Sensor signals can be affected by poor grounding, damaged shielding,
parallel routing with higher-voltage conductors or nearby switching
equipment.
Low-voltage signal wiring should be separated from motors, dimmers,
fluorescent ballasts, transformers and high-current conductors where
practical.
Do not modify cable length, splice shielded cables or replace connectors
unless the product documentation specifically permits the modification.
Diagnostic Warning:
Intermittent false activation can originate from electrical noise rather
than the optical environment. Inspect cable routing and power quality before
replacing the sensor.
Moisture Protection
Preserve the Rated Enclosure Configuration
An IP-rated sensor, controller or battery enclosure provides its declared
protection only when installed in the tested orientation with the approved
seals, covers, cable glands and connectors.
Open connector caps, missing gaskets, damaged cable glands or unsealed
field-made openings can compromise the enclosure.
Cables should enter in a manner that prevents water from running directly
along the cable into the enclosure. A controlled drip loop may be required
where permitted by the installation design.
Sealant should not be used as a substitute for a missing factory gasket or
approved connector.
Ingress Protection
Verify Every Component Separately
|
Component
|
Exposure Condition
|
Installation Verification
|
|
Dispenser Head
|
Direct user contact, splash and cleaning
|
Correct trim, seals and sensor-window condition
|
|
Sensor Module
|
Basin splash, condensation and cleaner residue
|
Intact window, gasket and cable entry
|
|
Controller
|
Under-counter leaks and refill spills
|
Elevated mounting and protected connectors
|
|
Battery Compartment
|
Humidity, cabinet cleaning and condensation
|
Closed cover, intact seal and accessible location
|
|
Power Supply
|
Soap leakage, plumbing leaks and heat
|
Dry location, secure mounting and listed enclosure
|
Installation Tolerances
Small Dimensional Errors Can Create Large Performance Problems
Automatic soap dispensers depend on the relationship between the outlet,
sensor, basin and user. A small error in mounting angle or location can place
soap on the counter or direct the sensor toward a reflective surface.
Installation tolerances should be established for mounting-hole location,
wall outlet centerline, finished-wall depth, dispenser rotation, spout reach
and concealed component clearances.
Where the project includes repeated wash stations, use an approved template
or coordinated shop drawing so fixture placement remains consistent.
Representative mockups should be measured and approved before repetitive
countertops or wall panels are fabricated.
Dimensional Control
Critical Installation Measurements
|
Measurement
|
Verify From
|
Potential Effect of Error
|
|
Mounting-Hole Centerline
|
Finished basin and counter references
|
Incorrect outlet position or basin interference
|
|
Counter Thickness
|
Completed countertop assembly
|
Insufficient shank engagement
|
|
Outlet Reach
|
Dispenser centerline to soap discharge point
|
Soap delivered onto rim or outside basin
|
|
Sensor Angle
|
Final dispenser body and basin geometry
|
False or missed activation
|
|
Wall Projection
|
Finished wall to outlet tip
|
Poor basin coverage or excessive projection
|
|
Component Clearance
|
Pump, reservoir, controller and cabinet structure
|
Blocked installation or service access
|
Serviceability
Every Replaceable Component Must Remain Accessible
Commercial installation should support maintenance without destructive
access or removal of unrelated fixtures. Pumps, controllers, batteries,
reservoirs, filters and connectors should be reachable using ordinary
service tools.
Access openings should be large enough to remove the component, not merely
to see it. A technician should be able to disconnect and reconnect tubing
and wiring without working blindly.
Service access should remain available after trash receptacles, storage
supplies, vanity panels and other operational items are placed in the room.
Fontana Commercial Soap Dispensers
®
should be coordinated with a documented replacement-parts strategy and
component identification plan.
Maintenance Access
Practical Service Clearance Checklist
Reservoir can be removed without disconnecting the trap.
Pump can be replaced without removing the basin.
Controller indicators remain visible.
Battery cover can open fully.
Tubing connectors can be reached by hand.
Power disconnect remains accessible.
Service panel can be removed without damaging finishes.
Component labels remain readable.
Replacement components fit through the access opening.
Spill containment can be removed and cleaned.
Installation Inspection
Mechanical Completion Checklist
Dispenser body is secure and correctly aligned.
Countertop or wall finish is undamaged.
Sensor window is clean and unobstructed.
Reservoir is stable and correctly labeled.
Pump is mounted in the approved orientation.
Tubing is fully connected and free of kinks.
Controller is secured above possible leak paths.
Power wiring is protected and correctly connected.
All seals, covers and cable glands are installed.
Access panels and cabinet doors operate freely.
No component obstructs plumbing service.
Every branch and cable is identified.
Mechanical Completion Hold Point:
Do not begin final calibration until the dispenser, reservoir, tubing,
pump, controller, power supply, basin, faucet, lighting and adjacent
fixtures are installed in their final operating configuration.
Part 2 Technical Notice:
Reservoir capacity, tubing size, allowable tubing length, vertical lift,
pump orientation, connector type, soap compatibility, environmental protection
and component-clearance requirements vary by model. Confirm all values from the
applicable Fontana Soap Dispensers
®
installation instructions and approved project submittals before installation.
```html
Commissioning Preparation
Begin Startup Only After Mechanical Completion
Initial startup should begin only after the complete dispenser assembly,
pump, reservoir, tubing, controller, power system, basin, faucet and
surrounding wash-station components have been installed in their final
positions.
Temporary countertop layouts, unfinished wall conditions or loose
under-counter components can produce misleading commissioning results.
Sensor performance, tubing behavior and service access must be evaluated
under the actual completed restroom conditions.
The commissioning technician should review the approved product model,
power configuration, soap format, tubing arrangement and programmed
settings before applying power or introducing soap into the system.
Any unresolved mechanical deficiency should be corrected before startup.
Commissioning should not be used to compensate for an incorrectly positioned
dispenser, damaged tubing, inaccessible reservoir or unsupported pump.
Startup Hold Point:
Do not energize the system until all sensor, pump, controller and power
connections have been checked against the model-specific wiring and
installation documentation.
Pre-Startup Inspection
Conditions Required Before Power Is Applied
Approved dispenser model and controller are installed.
Pump orientation matches the installation instructions.
Reservoir is clean, stable and accessible.
Tubing is connected, supported and free of kinks.
Sensor cable is fully seated and undamaged.
Pump cable is connected to the correct controller port.
Power voltage and polarity have been verified.
Battery polarity and contact condition are correct.
Controller enclosure is secured and dry.
Protective film has been removed from the sensor.
Basin and counter surfaces are clean and dry.
Approved soap is available for filling and testing.
Commissioning Instruments
Recommended Startup and Verification Equipment
Commercial commissioning should use measured results rather than visual
judgment alone. The technician should have the tools required to verify
power, timing, soap quantity and installed conditions.
Digital Multimeter
Used to verify battery voltage, DC supply voltage, polarity and
loaded electrical condition.
Graduated Container
Used to collect and measure the delivered soap quantity during dose
calibration.
Digital Scale
Provides an alternative gravimetric method for determining delivered
soap mass.
Stopwatch
Used to measure activation response, priming duration and
time-to-soap.
Inspection Light
Supports inspection of connectors, tubing joints, pump fittings and
hidden leakage.
Commissioning Form
Records model information, settings, measured results, deficiencies
and final acceptance.
Initial Power-Up
Apply Power in a Controlled Sequence
The initial power-up should be performed with the soap system mechanically
complete and all electrical connectors secured. The technician should remain
at the fixture and observe the controller, sensor and pump during startup.
Some controllers perform a self-check, sensor-learning cycle or automatic
reset immediately after power is connected. Hands, tools and cleaning
materials should remain outside the detection field during this process.
Where the manufacturer specifies a startup waiting period, the system should
not be activated until that period is complete. Early hand movement can
interfere with environmental learning or sensor initialization.
Any unexpected pump operation, repeated activation, fault indication,
overheating or electrical odor requires immediate disconnection and
inspection.
Power-Up Sequence
Recommended Initial Energization Procedure
1
Confirm the Detection Area Is Clear
Remove hands, tools, packaging and reflective objects from beneath the
dispenser before energizing the controller.
2
Verify Supply Voltage
Measure the battery or hardwired supply and confirm compatibility with
the approved controller input.
3
Connect the Primary Power Source
Connect the battery pack, transformer output or approved primary supply
without forcing the connector.
4
Observe the Controller
Record indicator-light behavior, audible signals, startup movement or
displayed fault information.
5
Allow Initialization to Complete
Keep the sensor field clear for the full model-specific initialization
period.
6
Perform One Controlled Activation
Introduce a hand slowly into the intended detection zone and observe
sensor recognition and pump response.
Controller Startup
Interpret Indicators Before Continuing
Controller indicators may communicate normal standby, sensor detection,
pump operation, low battery, low soap, communication status or internal
faults.
The technician should compare the observed indicator pattern with the
model-specific commissioning instructions. Indicator meanings should not be
assumed because similar colors or flash patterns may represent different
conditions across controller models.
A controller showing a fault should not be repeatedly reset without
identifying the cause. Check connector seating, polarity, sensor condition,
pump connection and supply voltage first.
Record the initial indicator state before beginning priming. This creates a
baseline if a fault develops during fluid introduction.
Startup Observations
Initial Controller Verification Matrix
|
Observed Condition
|
Possible Meaning
|
Required Action
|
|
Normal Standby Indicator
|
Controller energized and waiting for activation
|
Continue with controlled sensor test
|
|
No Indicator or Response
|
No power, incorrect polarity, loose connector or controller fault
|
Verify loaded voltage and all power connections
|
|
Continuous Pump Operation
|
False detection, stuck control input or wiring error
|
Disconnect power and inspect sensor environment
|
|
Repeated Cycling
|
Reflective interference, unstable supply or reset failure
|
Inspect basin reflections, power and controller settings
|
|
Low-Battery Indication
|
Insufficient battery condition or voltage drop
|
Test under load and replace batteries if required
|
|
Fault Code
|
Sensor, pump, communication or internal controller problem
|
Follow model-specific fault diagnostic procedure
|
Loaded Power Testing
Verify Voltage While the Pump Operates
A battery pack or transformer can show acceptable voltage while the system
is idle but fall below the controller requirement when the pump starts.
This condition can cause weak output, controller resets or intermittent
operation.
Measure the supply during a dispensing cycle using the approved test points
and safe electrical procedure. Compare the loaded reading with the allowable
range in the technical documentation.
Where multiple dispensers share one power supply, test the system while
several pumps operate simultaneously. The supply and wiring should maintain
stable voltage under the anticipated combined load.
Diagnostic Principle:
Stable standby voltage does not prove adequate power capacity. Loaded
voltage is the more useful measurement when diagnosing resets, weak pumping
or inconsistent output.
Reservoir Filling
Prepare the Soap Supply Without Introducing Contamination
The reservoir should be clean, dry and free of residue from previous soap,
cleaning chemicals, packaging material or construction debris.
Different soap formulations should not be mixed unless the soap manufacturer
and dispenser documentation specifically permit it. Mixing products can
create thickening, separation, precipitation or foaming changes that restrict
the pump and tubing.
The approved soap should be poured using a clean refill container or direct
dispensing connection. Funnels, hoses and refill tools should be dedicated
to the compatible soap type.
Do not overfill the reservoir. Required air space, cap engagement, level
sensor operation and pickup-tube placement must be maintained.
Filling Procedure
Controlled Reservoir-Filling Sequence
1
Confirm Soap Compatibility
Verify liquid or foam format, formulation, viscosity range and any
product-specific restrictions.
2
Inspect the Reservoir
Check for contamination, cracking, residue, loose fittings or damaged
pickup components.
3
Protect Nearby Components
Cover or move exposed electrical equipment and position spill
containment beneath the refill area.
4
Add the Approved Soap
Fill slowly to reduce foaming and stop at the approved maximum level.
5
Install the Pickup Assembly
Confirm the pickup tube reaches the intended depth without curling,
kinking or sealing against the reservoir floor.
6
Secure the Closure
Fully engage the cap, vent, connector and any level-sensing component.
Pickup Assembly
Verify the Suction Path Inside the Reservoir
The pickup tube should remain below the operating soap level while avoiding
contact that seals the inlet against the reservoir base.
A tube that is too short can draw air before the reservoir is substantially
empty. A tube that is too long may curl, kink or trap against the sidewall.
Where a filter or weighted pickup fitting is provided, it should remain
clean and correctly oriented. Construction debris or dried soap can restrict
the inlet before commissioning begins.
The cap or reservoir connection must maintain the required venting
condition. An unvented rigid reservoir can develop vacuum and progressively
reduce soap flow.
Line Priming
Fill the Fluid Path Before Dose Calibration
Priming removes air from the reservoir pickup, pump chamber, tubing and
nozzle so each pump cycle moves soap rather than compressing trapped air.
A system should not be dose-calibrated until the line is fully primed.
Measurements taken while air remains in the tubing will be low, unstable and
not representative of normal operation.
Use the controller's dedicated prime function where provided. If priming is
completed through repeated sensor activations, follow the permitted duty
cycle and avoid continuous pump operation beyond the manufacturer's limit.
Collect soap at the nozzle throughout the process to prevent uncontrolled
discharge into the basin, cabinet or surrounding work area.
Priming Procedure
Recommended Single-Dispenser Priming Sequence
1
Confirm the Reservoir Is Filled
Verify the pickup is submerged and all suction-side fittings are
secure.
2
Position a Collection Container
Place a clean container beneath the outlet to observe air, liquid and
flow consistency.
3
Activate the Prime Mode
Use the designated button, controller sequence or approved repeated
activation method.
4
Observe the Tubing
Watch soap advance through transparent sections and inspect for
collapsing tube, leaks or persistent bubbles.
5
Continue Until Soap Reaches the Outlet
Do not stop at the first partial discharge if visible air remains in
the line.
6
Stabilize the Output
Perform several normal cycles until the delivered quantity and
appearance are repeatable.
Priming Observation
What the Technician Should Watch During Priming
|
Observed Condition
|
Likely Cause
|
Corrective Action
|
|
Soap Advances Normally
|
Fluid path and pump are operating correctly
|
Continue until output stabilizes
|
|
Soap Does Not Enter the Tube
|
Pickup not submerged, suction leak or blocked inlet
|
Inspect reservoir, cap, pickup and suction fitting
|
|
Tube Collapses During Pumping
|
Blocked pickup, excessive viscosity or unvented reservoir
|
Correct restriction and verify soap compatibility
|
|
Large Air Gaps Continue
|
Loose suction connection or insufficient soap level
|
Reseat connections and inspect pickup depth
|
|
Pump Runs but No Fluid Moves
|
Incorrect pump direction, dry pump or internal pump fault
|
Verify pump installation and approved priming method
|
|
Soap Leaks at a Joint
|
Incomplete tube insertion, damaged fitting or incorrect tube size
|
Disconnect power, repair connection and reprime
|
|
Output Contains Fine Bubbles
|
Residual air, foaming from refill or suction-side air entry
|
Allow settling and continue controlled priming
|
Air Removal
Eliminate Trapped Air Before Performance Testing
Air compresses during a pump cycle and can delay soap movement, reduce
delivered quantity and produce irregular discharge. Even small air pockets
can affect short-cycle dispensing systems.
Air commonly remains at high points, loose loops, pump chambers, fittings
and changes in tubing diameter. Tubing routes should be adjusted where
permitted to remove unnecessary high points and low loops.
Lightly repositioning flexible tubing may help bubbles travel toward the
outlet, but tubing should not be sharply bent, squeezed or disconnected
while the system is pressurized.
After visible air is removed, perform several cycles separated by normal
reset periods. Repeatable output is the practical confirmation that the line
has stabilized.
Air-Ingress Diagnostics
Persistent Bubbles Indicate a System Defect
A newly filled system may contain temporary trapped air, but bubbles should
decrease as priming continues. Air that repeatedly returns after the line
appears full usually indicates an inlet-side leak or pickup problem.
Suction-side leaks may not release visible soap because the internal
pressure is below atmospheric pressure while the pump draws fluid. Instead,
air enters the line and interrupts the soap column.
Inspect the reservoir cap, pickup fitting, inlet tube, pump inlet and all
associated seals. Connections should be checked while the pump operates.
Diagnostic Indicator:
Bubbles that repeatedly originate at the same fitting strongly suggest air
entry at or immediately upstream of that connection.
MultiFeed Priming
Prime Central Systems by Zone and Branch
Central MultiFeed systems should be primed in an organized sequence so air
is removed from the main line and each branch without losing track of which
outlets have been completed.
The recommended sequence normally begins with the central reservoir, pump
and main distribution path, followed by individual branches. The exact order
should follow the approved system design and product documentation.
Where branch isolation is provided, open only the branch being primed. This
can concentrate available flow and simplify bubble removal.
After all branches are filled, operate representative outlets together to
confirm that one branch does not lose prime when another dispenser runs.
Central Priming Sequence
Recommended MultiFeed Startup Procedure
1
Fill and Inspect the Central Reservoir
Confirm soap compatibility, pickup depth, venting and reservoir
stability.
2
Prime the Main Supply Path
Operate the central pump until soap reaches the first distribution or
branch point.
3
Prime the Longest or Highest Branch
Begin with the hydraulically demanding branch where permitted by the
approved sequence.
4
Prime Remaining Branches Individually
Label and record each completed outlet to avoid incomplete
commissioning.
5
Inspect All Branch Connections
Check tees, valves, connectors and concealed joints during pump
operation.
6
Perform Simultaneous Operation Testing
Activate representative dispensers together and observe pressure,
response and branch stability.
Leak Inspection
Inspect the System Under Dynamic Conditions
Leak inspection should be performed while the pump operates and immediately
after the dispensing cycle. Static inspection alone may not reveal
pressure-side leakage.
Use a clean dry wipe at each connector to detect small amounts of soap.
Check the reservoir connection, pump inlet, pump outlet, branch fittings,
nozzle connection and any service valves.
Soap residue from filling should be removed before leak inspection so it is
not mistaken for an active leak.
Any leaking connector should be repaired before calibration. Soap loss can
change dose, introduce air and damage cabinetry or electrical equipment.
Leak-Test Matrix
Required Fluid-System Inspection Points
|
Inspection Point
|
Test Condition
|
Acceptance Condition
|
|
Reservoir Cap and Pickup
|
During pump suction
|
No air entry, loose fitting or soap seepage
|
|
Pump Inlet
|
During repeated priming cycles
|
Stable soap column without recurring bubbles
|
|
Pump Outlet
|
During pump discharge
|
No wetness, movement or connector separation
|
|
Tubing Joints
|
During and immediately after operation
|
Dry exterior and secure engagement
|
|
Branch Fittings
|
During single and simultaneous outlet operation
|
No leakage or branch air entry
|
|
Dispenser Connection
|
During delivery at the outlet
|
Soap exits only from the intended nozzle
|
|
Static Hold
|
After several completed cycles
|
No continuing drip, seepage or pressure loss
|
Outlet Stabilization
Confirm a Complete and Repeatable Soap Discharge
The first soap reaching the outlet may contain air, appear irregular or
produce a partial dose. Continue controlled operation until the discharge
appearance and quantity become stable.
Liquid soap should exit through the intended opening without side leakage,
sputtering or persistent stringing beyond the expected formulation behavior.
Foam output should show consistent expansion and texture. Wet, weak or
irregular foam may indicate residual air, incorrect soap, blocked air intake
or an incomplete mixing process.
Do not begin final dose measurement until at least several consecutive
cycles display similar output.
Pre-Calibration Verification
Confirm System Stability Before Adjusting Settings
Controller completes startup without faults.
Loaded supply voltage remains within the approved range.
Reservoir contains the approved soap.
Pickup remains submerged and unobstructed.
Tubing is fully filled with no recurring air gaps.
Pump produces consistent operating sound.
All tubing joints remain dry under operation.
Soap exits only through the intended outlet.
Output stabilizes across repeated cycles.
System resets normally after each activation.
No uncontrolled or continuous dispensing occurs.
Initial observations have been recorded.
Startup Documentation
Record the Initial Commissioning Baseline
The startup record should identify the exact installed equipment and the
conditions under which priming was completed. This information provides the
baseline for final calibration and future maintenance.
|
Record Field
|
Information to Document
|
|
Project Identification
|
Building, floor, restroom, fixture number and commissioning date
|
|
Installed Equipment
|
Dispenser, sensor, pump, controller and reservoir model numbers
|
|
Power Configuration
|
Battery, hardwired, hybrid or central supply arrangement
|
|
Measured Voltage
|
Standby and loaded voltage readings
|
|
Soap Product
|
Manufacturer, product name, liquid or foam format and batch if required
|
|
Reservoir Condition
|
Fill level, capacity and pickup configuration
|
|
Priming Result
|
Time, number of cycles, observed air and final stability
|
|
Leak Inspection
|
Joints inspected, deficiencies found and corrective work
|
|
Technician
|
Name, organization and verification signature
|
Part 3A Technical Notice:
Startup sequence, initialization time, priming method, pump duty cycle,
acceptable loaded voltage, reservoir filling limit and fault-indicator meanings
vary by model. Follow the applicable Fontana Soap Dispensers
®
installation and commissioning documentation. Do not run a dry pump beyond the
permitted duration or substitute unapproved soap formulations.
```html
Calibration Readiness
Calibrate Only After the Fluid System Has Stabilized
Sensor and dose calibration should begin only after the soap line is fully
primed, recurring air has been removed, active leaks have been corrected and
the controller completes startup without a fault condition.
Calibration performed before priming is complete can produce misleading
results. A technician may increase pump duration to compensate for trapped
air, creating an excessive soap dose once the line becomes fully filled.
The final countertop, basin, faucet, lighting, mirror, wall finish and
adjacent dispensers should be present during calibration because these
elements can affect the optical environment and expected user hand position.
Fontana Soap Dispensers
®
should be calibrated using the model-specific controls, adjustment sequence
and approved measurement method. Generic settings should not be copied from
another dispenser without verification.
Calibration Principle:
Adjust one variable at a time, record the change and repeat the same test
procedure before deciding whether the adjustment improved performance.
Calibration Sequence
Recommended Order of Adjustment
1
Verify Stable Power and Standby
Confirm the controller remains energized, shows no active fault and
maintains acceptable voltage during pump operation.
2
Establish the Intended Hand Position
Identify where a user should naturally place a hand beneath the outlet
without contacting the basin or dispenser.
3
Adjust Sensor Detection
Set the detection range or learning mode so intentional hand entry is
recognized without detecting the basin or surrounding fixtures.
4
Confirm Reset Behavior
Verify that one hand entry produces one dispensing cycle and that the
system returns to standby after the hand is removed.
5
Measure the Soap Dose
Collect multiple stabilized cycles and determine the average delivered
quantity.
6
Adjust Pump Output
Change the approved dose setting in small increments and repeat the same
measurement procedure.
7
Verify Time-to-Soap
Measure the interval from confirmed hand detection to visible soap
discharge at the outlet.
8
Complete Repeated Functional Testing
Run repeated cycles using different hand sizes, approach directions and
normal restroom conditions.
Sensor Calibration
Define the Intended Detection Zone
The detection zone should include the natural hand position beneath the soap
outlet while excluding the basin rim, drain, faucet stream, counter edge and
nearby movement.
A detection range that is too short may require the user to search for the
sensor or place a hand uncomfortably close to the outlet. A range that is too
long can increase false activation from the basin, clothing, cleaning tools
or activity at an adjacent fixture.
Calibration should be based on actual hand movement rather than a stationary
test object alone. Hands differ in size, skin reflectivity, angle and speed
of approach.
The sensor should recognize the hand before contact with the dispenser,
counter or basin while maintaining enough separation to prevent soap from
striking the user's wrist or missing the palm.
Detection Geometry
Test More Than One Approach Direction
Vertical Entry
Move the hand upward from below the outlet into the intended sensor
zone.
Forward Entry
Approach from the user side toward the basin and dispenser.
Side Entry
Approach from left and right to evaluate sensor symmetry and adjacent
fixture influence.
Small Hand
Use a smaller hand profile to evaluate detection sensitivity and
accessible operation.
Large Hand
Verify that a larger hand does not activate too early or obstruct the
soap path.
Gloved Hand
Test representative gloves where healthcare, food service or
industrial use is expected.
Detection Range
Adjust for Reliable Intentional Activation
Where adjustable range is provided, begin with the recommended default or
model-specific commissioning value. Test the system before making any
change.
If missed activations occur, increase the detection range incrementally
while monitoring whether the basin, drain or surrounding surfaces enter the
active field.
If false activations occur, reduce the range or use the specified learning,
filtering or environmental compensation function. Do not immediately reduce
the range so far that normal users must search for activation.
After each adjustment, allow the controller to reset or relearn according to
the model-specific procedure before retesting.
Do Not Mask a Layout Error:
Extreme sensor adjustment should not be used to compensate for an outlet
that points toward the basin rim or a dispenser mounted in the wrong
location.
Range Verification
Sensor Adjustment Decision Matrix
|
Observed Performance
|
Possible Condition
|
Adjustment Direction
|
Additional Check
|
|
Hand Detected Too Late
|
Range too short or sensor partially obstructed
|
Increase range incrementally
|
Clean sensor and verify mounting angle
|
|
Hand Not Detected Consistently
|
Weak signal, glare, poor geometry or cable fault
|
Adjust only after physical inspection
|
Test several hand profiles and lighting conditions
|
|
Dispenser Activates Before Hand Reaches Basin
|
Range too long
|
Reduce range incrementally
|
Check nearby pedestrian movement
|
|
Activation Occurs Without a User
|
Basin reflection, water stream, cross talk or electrical noise
|
Do not assume range alone is responsible
|
Perform false-activation diagnostics
|
|
Activation Requires Contact
|
Range substantially too short or sensor failure
|
Increase range or diagnose sensor
|
Confirm controller input and sensor window condition
|
|
One User Activates Two Dispensers
|
Overlapping detection zones or cross talk
|
Refine range and unit configuration
|
Test adjacent units independently and together
|
Sensor Learning
Complete Environmental Learning Under Final Conditions
Some automatic dispensers use an initialization or learning routine to
establish the background optical condition. During this period, the sensor
field should remain clear.
The final lighting, mirror illumination, basin surface and faucet should be
in their normal operating state when learning is performed.
If a basin, mirror, faucet or permanent light fixture is replaced after
commissioning, the sensor may require relearning or recalibration.
Temporary construction lighting, protective covers and unfinished surfaces
should not be treated as the final optical environment.
Relearning Trigger:
Repeat the approved learning procedure after changes to mounting position,
basin finish, lighting, mirror systems or surrounding reflective surfaces.
Activation Logic
Verify One Intended Entry Produces One Dose
The controller should recognize intentional hand entry, activate the pump
once and then require the defined reset condition before permitting another
cycle.
If the controller permits immediate repeated dispensing while the hand
remains in place, soap use may increase and the basin may become excessively
soiled.
If the lockout period is too long, a second user may experience a missed
activation. The reset and lockout behavior should match the scheduled system
and expected use pattern.
The technician should test both rapid hand removal and prolonged hand
presence beneath the outlet.
Reset Testing
Activation and Reset Verification Procedure
1
Allow the System to Reach Standby
Confirm the controller has completed initialization and no object is
inside the detection field.
2
Enter the Detection Zone Once
Use one deliberate hand movement and observe whether one pump cycle
occurs.
3
Hold the Hand in Position
Maintain the hand beneath the outlet for several seconds and observe
whether unintended repeat cycles occur.
4
Remove the Hand Completely
Allow the controller to detect field clearance and complete its reset
period.
5
Re-enter the Detection Zone
Confirm the system responds normally to the next valid activation.
6
Repeat at Different Speeds
Test slow, normal and rapid hand movements to confirm stable reset logic.
Dose Control
Calibrated Soap Delivery Requires Measurement
Soap dose should be established by collecting and measuring multiple
stabilized dispensing cycles. Visual estimates are not sufficiently precise
for commercial acceptance testing.
The project team should identify the intended dose range based on the
scheduled dispenser, approved soap, handwashing protocol, basin size and
facility requirements.
Too little soap may not provide the intended user quantity and can result in
repeated activations. Too much soap increases consumption, refill frequency
and residue inside the basin.
Fontana Dose Control should be adjusted only after the soap formulation,
fluid temperature, line prime and power condition have stabilized.
Measurement Method
Use Multiple Cycles to Determine Average Dose
A single cycle can be influenced by a remaining air pocket, residue at the
nozzle or normal short-term pump variation. A multi-cycle average provides a
more reliable measurement.
1
Stabilize the Dispenser
Perform several normal cycles and confirm the output appears consistent.
2
Prepare the Collection Device
Use a clean graduated container or a tared weighing vessel compatible
with the soap.
3
Collect a Defined Number of Cycles
Collect the same number of complete cycles for every adjustment trial.
4
Measure the Total Quantity
Read the total volume or mass using the selected measurement method.
5
Calculate the Average Dose
Divide the total collected quantity by the number of complete dispensing
cycles.
6
Record the Result and Setting
Document the controller setting, soap product, cycle count and measured
average.
Volumetric Testing
Graduated-Container Dose Verification
Volumetric testing collects multiple dispensing cycles in a graduated
container and divides the total observed volume by the cycle count.
This method is straightforward for many liquid soaps, but foam volume can
change as bubbles expand or collapse. Foam measurements should follow the
product-specific verification method.
The container should be positioned so the complete discharge enters without
contacting the rim or splashing outside.
Read the liquid level consistently and allow large trapped bubbles to settle
where required before recording the result.
Gravimetric Testing
Digital-Scale Dose Verification
Gravimetric testing determines the mass of soap delivered over a defined
number of cycles. A clean container is placed on the scale and tared before
collection.
This method can provide improved resolution when individual dose volumes are
small. The scale should have sufficient accuracy and should be protected
from vibration, drafts and soap contamination.
Mass and volume should not be treated as interchangeable unless the soap
density is known. Record the result using the unit actually measured.
Measurement Consistency:
Do not compare one dispenser measured by volume with another measured by
mass unless a documented density conversion is applied.
Dose Adjustment
Change Pump Output in Controlled Increments
Where the controller provides adjustable pump duration, speed, stroke count
or programmed dose levels, begin with the approved default or scheduled
project setting.
Increase or decrease the output by one defined increment at a time. Perform
several stabilization cycles after each change before collecting the next
measurement sample.
Large changes can overshoot the intended dose and make troubleshooting more
difficult. The final setting should achieve the required quantity while
maintaining acceptable response and anti-drip performance.
If increasing the setting does not produce a proportional increase in dose,
inspect for restricted tubing, low voltage, air entry, pump wear or
incompatible soap viscosity.
Dose Diagnostics
Delivered-Quantity Troubleshooting Matrix
|
Observed Result
|
Possible Cause
|
Corrective Direction
|
|
Dose Consistently Too Low
|
Low setting, restricted tubing, weak power or high viscosity
|
Inspect system condition before increasing output
|
|
Dose Consistently Too High
|
Excessive pump duration or incorrect program
|
Reduce output incrementally and retest
|
|
Dose Varies Widely
|
Air, unstable voltage, loose connection or pump inconsistency
|
Correct instability before adjusting the programmed dose
|
|
First Dose Low After Idle Period
|
Drainback, air entry, check-valve leakage or long tubing
|
Inspect fluid retention and suction-side sealing
|
|
Dose Declines During Repeated Use
|
Voltage drop, pickup restriction, collapsing tube or pump heating
|
Test under sustained operating load
|
|
Dose Increases After Warm-Up
|
Soap viscosity changes with temperature
|
Calibrate under representative operating temperature
|
|
Soap Continues After Pump Stops
|
Gravity head, siphoning, check-valve issue or excessive pressure
|
Correct reservoir elevation and inspect valve function
|
Response Verification
Measure Time-to-Soap at the Outlet
Time-to-soap is the interval between confirmed hand detection and visible
soap discharge from the nozzle. It includes sensor recognition, controller
processing, pump startup and fluid movement.
A sensor may respond immediately while soap delivery remains delayed because
of air, long tubing, drainback, low voltage or pump wear.
The test should begin with the system in normal standby. Introduce the hand
using a repeatable movement and measure the interval until soap first exits
the intended opening.
Measure several cycles and record the average as well as any unusually slow
cycle. Consistency is as important as the average response.
Response Components
Factors That Influence Delivery Delay
Sensor Recognition
Detection range, hand reflectivity, optical interference and
controller filtering influence recognition time.
Controller Delay
Programmed confirmation time and anti-false-trigger logic may delay
pump command.
Pump Startup
Voltage condition, motor response and mechanical load influence pump
acceleration.
Fluid Retention
Check valves and tubing condition determine whether soap remains near
the outlet between cycles.
Tubing Volume
Long or oversized fluid paths can increase the volume displaced
before delivery.
Soap Viscosity
Thicker formulations may move more slowly and place greater load on
the pump.
Time-to-Soap Procedure
Repeatable Response-Time Testing
1
Confirm Normal Standby
Allow the dispenser to complete its reset period before every measured
cycle.
2
Use a Defined Hand Path
Introduce the hand from the same direction and at approximately the same
speed for each trial.
3
Start Timing at Detection
Use a visible sensor indicator, pump command or defined hand-position
reference according to the test method.
4
Stop Timing at Visible Discharge
Record the interval when soap first exits the nozzle.
5
Repeat Multiple Cycles
Perform enough trials to identify the average, fastest, slowest and any
abnormal cycle.
6
Test After an Idle Period
Repeat the measurement after the dispenser has remained unused for a
defined period to detect drainback or loss of prime.
Idle Recovery
Verify the First Dose After Nonuse
A dispenser may perform normally during repeated cycles but deliver slowly
or incompletely after remaining idle. This can indicate soap drainback,
check-valve leakage, air entry or nozzle drying.
Commissioning should include a first-use test after an appropriate idle
period. For critical facilities, project procedures may require additional
extended-idle verification.
The first cycle after idle should meet the project acceptance requirement
without manual priming or repeated hand entries.
Important:
Do not accept a system based only on rapid consecutive activations. Verify
performance after the dispenser has returned to a normal unused condition.
Anti-Drip Verification
Confirm Soap Stops at the End of Each Cycle
The system should complete the programmed dose and stop without continuing
to release soap after the pump cycle ends.
A small formulation-dependent tail may occur at the nozzle, but ongoing
dripping, siphoning or repeated drops indicate a condition that requires
investigation.
Observe the outlet immediately after dispensing and again after the
dispenser has remained idle. Inspect reservoir elevation, check-valve
function, tubing routing, nozzle condition and pump control if dripping
continues.
Excess soap accumulation at the outlet should be cleaned before testing so
residual material is not mistaken for an active leak.
Discharge Quality
Verify Where and How the Soap Lands
|
Performance Characteristic
|
Acceptance Observation
|
Potential Defect
|
|
Outlet Direction
|
Soap enters the intended hand and basin zone
|
Incorrect mounting rotation or nozzle alignment
|
|
Discharge Shape
|
Output is complete and repeatable
|
Partial blockage, air or damaged nozzle
|
|
Cycle Termination
|
Flow stops at the end of the programmed cycle
|
Siphoning, valve leakage or controller fault
|
|
Basin Containment
|
Soap does not land on the counter or outside the bowl
|
Incorrect reach, angle or mounting location
|
|
User Contact Zone
|
Soap reaches the palm without striking the wrist
|
Sensor activates too early or outlet position is incorrect
|
|
Foam Texture
|
Consistent expansion, texture and volume
|
Soap incompatibility, blocked air path or mixing fault
|
Repeatability Testing
One Successful Cycle Is Not Sufficient
Functional testing should include repeated activations to establish that
detection, dose, response and reset remain consistent across multiple cycles.
The test sequence should include normal intervals, rapid consecutive users
and short idle periods. High-traffic projects may require a larger
commissioning sample.
Record missed activations, double activations, delayed cycles, incomplete
doses and any change in pump sound or output.
A dispenser that performs inconsistently should not be accepted based on its
best cycle. The cause of variation must be identified and corrected.
Functional Test
Initial Repeated-Cycle Verification
Each valid hand entry produces one dispensing cycle.
No cycle occurs while the detection zone is empty.
The hand is detected from the intended approach.
The system resets after the hand is removed.
The delivered dose remains within the approved range.
Time-to-soap remains consistent.
No recurring air appears in the tubing.
Pump sound remains stable.
Loaded voltage remains acceptable.
No active leakage develops.
Soap lands in the intended hand and basin area.
No continuing drip occurs after the cycle.
Multi-Outlet Calibration
Verify Consistency Across Repeated Wash Stations
Projects with multiple dispensers should establish an approved calibration
target and apply the same verification method to every installed unit.
Identical programmed settings do not always produce identical delivered
quantities because tubing length, elevation, power condition and pump
tolerance can vary.
Measure representative units at the beginning of the installation process,
then verify all remaining units according to the project commissioning plan.
Outliers should be investigated rather than automatically adjusted. A
substantial difference may indicate air, restricted tubing, incorrect soap,
low voltage or a connection defect.
MultiFeed Balancing
Compare the Longest, Shortest, Highest and Lowest Branches
Central Fontana MultiFeed
®
systems should be tested at the most hydraulically different outlets, not
only at the fixture nearest the reservoir.
The longest or highest branch may show delayed response or reduced dose,
while the shortest or lowest branch may receive more immediate delivery.
Where branch balancing or individual outlet adjustment is provided, calibrate
using measured results and record the final branch setting.
After individual calibration, activate representative outlets
simultaneously to confirm that combined demand does not create unacceptable
response variation.
Calibration Records
Document the Final Sensor and Dose Settings
Commissioning records should allow a future technician to identify the
accepted baseline without repeating the entire setup process.
Record the programmed range, dose level, pump duration, lockout or reset
setting, soap product, loaded voltage and measured performance.
If the controller uses numbered or named program levels rather than direct
dimensional values, record the exact selected level.
Document any location-specific adjustment caused by basin geometry,
lighting, branch length or environmental conditions.
Commissioning Record
Sensor and Dose Calibration Data Sheet
|
Record Field
|
Required Entry
|
Verification Method
|
|
Fixture Identification
|
Building, restroom, basin position and asset number
|
Match installed label and project drawings
|
|
Sensor Technology
|
Infrared, Time-of-Flight or hybrid configuration
|
Approved product documentation
|
|
Detection Setting
|
Program level, measured range or learning mode
|
Controller setting and hand-entry test
|
|
Reset or Lockout
|
Final programmed behavior
|
Hold-hand and repeat-entry test
|
|
Dose Setting
|
Pump duration, speed, stroke or program level
|
Controller configuration
|
|
Measured Average Dose
|
Volume or mass per activation
|
Multi-cycle collection
|
|
Time-to-Soap
|
Average and maximum observed response
|
Repeated stopwatch testing
|
|
Idle Recovery
|
Result after defined nonuse period
|
First-dose verification
|
|
Anti-Drip Result
|
Pass, fail or corrective action
|
Immediate and delayed outlet observation
|
|
Technician Approval
|
Name, organization, date and signature
|
Completed commissioning record
|
Initial Acceptance Gate
Conditions Required Before Advanced Performance Testing
Sensor detects intentional hand entry consistently.
Detection zone does not require physical contact.
One hand entry produces one dose.
System resets normally after hand removal.
Dose has been measured using multiple cycles.
Average dose meets the approved project target.
Time-to-soap is consistent and acceptable.
First dose after idle remains complete.
Soap lands within the intended basin zone.
No continuing drip or siphoning occurs.
Power remains stable under repeated operation.
Final calibration settings are documented.
Advance to Part 4 Testing Only After This Gate Is Passed:
False activation, reflective-surface, cross-talk, environmental, simultaneous
use and power-failure testing should begin only after basic sensor and dose
performance are stable.
Part 3B Technical Notice:
Sensor range, initialization procedure, reset logic, pump duration, calibrated
dose, response-time target and acceptable output variation depend on the
model-specific Fontana Soap Dispensers
®
documentation and approved project requirements. Any numeric acceptance value
should be established from the scheduled equipment, soap formulation,
commissioning plan and authority-having-jurisdiction requirements.
```html
Advanced Performance Testing
Verify Sensor Stability Under Real Restroom Conditions
After basic detection, dose and response performance have been stabilized,
the dispenser should be tested against environmental conditions that can
produce false activation, missed activation or inconsistent operation.
Commercial wash stations contain reflective basins, polished drains,
automatic faucets, mirrors, changing light levels, moving users and cleaning
activity. These conditions can affect sensor behavior even when the
dispenser performs correctly during a simple hand-entry test.
Part 4A testing should be completed with the restroom substantially finished
and operating under its normal lighting, faucet, ventilation and cleaning
conditions.
Testing should include both isolated operation and interaction with adjacent
automatic fixtures. Any unstable condition should be documented with the
exact environmental trigger, not described only as an intermittent sensor
problem.
Testing Principle:
A reliable dispenser must activate when a user intentionally presents a
hand and remain inactive when no valid user action occurs.
Test Preparation
Establish the Final Operating Environment
Final basin, counter and faucet are installed.
Mirrors and reflective wall finishes are complete.
Permanent lighting is energized.
Automatic faucet is calibrated and operational.
Adjacent soap dispensers are energized.
Sensor windows are clean and dry.
Protective construction films have been removed.
Basin and counter are free of temporary tools.
Normal HVAC and exhaust systems are operating.
Approved soap and final dose settings are in place.
Controller fault history has been reviewed.
Test observations can be recorded by fixture number.
False Activation
Identify Dispensing Cycles Without Valid Hand Entry
A false activation occurs when the dispenser initiates a pump cycle without
an intentional hand entering the approved detection zone.
False activation can waste soap, increase refill frequency, contaminate the
basin, create countertop residue and reduce confidence in the touchless
system.
Potential triggers include reflective surfaces, moving water, changing
light, adjacent sensors, loose wiring, electrical interference, cleaning
tools or an excessive detection range.
The technician should observe the dispenser during a controlled no-user
period and then introduce likely environmental triggers one at a time.
No-User Observation
Begin With a Stable Empty Detection Field
Remove all hands, tools, cloths and movable objects from the sensor field.
Allow the controller to reset and observe the fixture without interaction.
The observation period should be long enough to capture delayed resets,
periodic electrical disturbances or repeated false cycling.
Record every unintended activation, including the time, nearby activity,
faucet condition, lighting state and whether an adjacent dispenser was used.
Important:
Do not place a test container or measuring instrument inside the detection
field during no-user observation. The test equipment itself may become the
trigger.
False-Activation Procedure
Controlled Environmental Trigger Testing
1
Establish Empty-Field Standby
Confirm the dispenser remains inactive with no user or object beneath
the outlet.
2
Operate the Faucet
Run the faucet through normal activation, flow and shutoff while
observing the soap dispenser.
3
Switch Permanent Lighting
Test normal light switching, occupancy controls and mirror illumination
where applicable.
4
Operate Adjacent Fixtures
Activate nearby faucets and dispensers individually and simultaneously.
5
Simulate User Movement
Walk past the wash station and move clothing outside the intended hand
zone.
6
Simulate Cleaning Activity
Move representative cloths and tools near the basin without entering the
approved activation zone.
7
Observe After Each Trigger
Allow the controller to reset before introducing the next environmental
condition.
False-Activation Diagnostics
Determine the Trigger Before Changing the Sensor
|
Observed Trigger
|
Likely Mechanism
|
Corrective Direction
|
|
Activation When Faucet Runs
|
Moving water, splash or reflection enters the sensor field
|
Review sensor angle, range and faucet discharge geometry
|
|
Activation When Lights Switch
|
Optical transition, ballast noise or power disturbance
|
Test optical and electrical causes separately
|
|
Activation When Adjacent Unit Operates
|
Sensor cross talk, overlapping fields or shared power instability
|
Isolate adjacent units and test synchronization
|
|
Activation During Cleaning
|
Cloth, spray, tool or reflective cleaner enters the field
|
Refine cleaning procedure or detection boundary
|
|
Random Activation With No Visible Trigger
|
Electrical noise, loose connector or unstable controller
|
Inspect wiring, shielding, power and fault history
|
|
Continuous Cycling
|
Permanent object detected, excessive range or control fault
|
Clear field, inspect geometry and reset controller
|
|
Activation From User Passing Nearby
|
Detection field extends beyond intended hand zone
|
Reduce or redirect the effective sensing area
|
Missed Activation
Verify Every Valid Hand Entry Is Recognized
A missed activation occurs when a hand enters the intended detection zone
but the dispenser does not initiate the required dispensing cycle.
Missed activations can result from insufficient range, poor sensor angle,
strong ambient light, a contaminated sensor window, reflective cancellation,
incorrect reset timing or an electrical connection problem.
User technique also varies. The system should recognize representative slow,
normal and rapid approaches without requiring the user to touch the
dispenser or repeatedly search for the sensor.
The technician should test several hand sizes, skin orientations and
approach directions under final lighting conditions.
Missed-Activation Test
Repeatable Hand-Entry Verification
1
Confirm Full Reset
Allow the controller to return to normal standby before each trial.
2
Use the Approved Hand Position
Place the palm beneath the outlet within the intended user zone.
3
Test Slow Entry
Move the hand gradually into the detection zone and observe recognition.
4
Test Normal Entry
Use a natural handwashing movement at typical user speed.
5
Test Rapid Entry
Move the hand quickly through the expected detection area.
6
Repeat From Multiple Directions
Test forward, vertical, left-side and right-side approaches.
7
Record Every Miss
Document the approach, lighting condition, hand position and controller
state for each missed cycle.
Missed-Activation Diagnostics
Distinguish Sensor Failure From Reset or Power Failure
|
Observed Condition
|
Possible Cause
|
Verification
|
|
No Detection Indicator
|
Range, alignment, sensor contamination or cable fault
|
Clean sensor, inspect field and verify connection
|
|
Detection Indicator Without Pumping
|
Pump connection, controller output or power problem
|
Test pump command and loaded voltage
|
|
Miss Occurs After Previous Use
|
Reset or lockout period not complete
|
Measure reset interval and hand-clearance behavior
|
|
Miss Occurs Only in Bright Light
|
Optical saturation or glare
|
Compare performance under controlled lighting states
|
|
Miss Occurs With Small Hands
|
Insufficient effective detection area
|
Refine range while monitoring false activation
|
|
Miss Occurs During Rapid Entry
|
Filtering delay or narrow detection zone
|
Test approach speed and controller programming
|
|
Miss Occurs Randomly Across All Users
|
Power instability, connector movement or internal fault
|
Monitor voltage, wiring and fault history
|
Sensor Cross Talk
Prevent One Fixture From Triggering Another
Cross talk occurs when the sensing or optical activity of one automatic
fixture affects the operation of another nearby fixture.
Closely spaced soap dispensers, touchless faucets and other infrared devices
may create overlapping detection fields or optical interference.
The risk increases where fixtures face one another, use highly reflective
basins or are mounted with similar sensor angles.
Cross-talk testing should include individual activation, simultaneous
activation and idle observation with all adjacent automatic fixtures
energized.
Cross-Talk Procedure
Isolate and Recombine Adjacent Fixtures
1
Test the Target Dispenser Alone
Temporarily isolate adjacent fixtures where permitted and confirm stable
operation.
2
Energize the Nearest Soap Dispenser
Observe both fixtures at standby before introducing a hand.
3
Activate One Unit at a Time
Confirm the neighboring dispenser remains inactive.
4
Activate Both Units Simultaneously
Use two operators or a controlled test method to evaluate combined
optical activity.
5
Add the Automatic Faucet
Repeat the test while nearby faucet sensors are operating.
6
Test Every Adjacent Combination
Include left, right, opposite and back-to-back fixtures where applicable.
Cross-Talk Correction
Correct Overlap Without Reducing User Accessibility
Corrective action may include refining sensor range, changing the approved
sensor mode, adjusting fixture orientation or applying model-specific
synchronization or anti-interference settings.
Physical spacing and mounting geometry should be reviewed before reducing
the detection zone to an impractically short distance.
Where shared power supplies are used, verify that the apparent cross talk is
not actually a voltage disturbance caused by simultaneous pump operation.
After adjustment, repeat individual, simultaneous and no-user observation
tests.
Do Not Assume Optical Interference:
Two fixtures failing at the same time may indicate shared-power voltage drop
or electrical noise rather than direct sensor cross talk.
Reflective Surfaces
Test Basins, Drains, Faucets and Counter Finishes
Polished metal, glossy stone, glass, glazed ceramic and water-covered
surfaces can redirect optical energy toward the sensor.
The reflective condition may change after the basin becomes wet, after
cleaning chemicals are applied or when the permanent lighting is switched.
A fixture that remains stable over a dry matte surface may behave
differently above a polished basin with a bright drain and chrome faucet.
Testing should therefore include dry, wet and normally cleaned surface
conditions.
Reflection Testing
Surface-Condition Verification Procedure
1
Test the Dry Basin
Observe standby stability and intentional hand detection with all
surfaces dry.
2
Wet the Basin Normally
Operate the faucet and allow water to coat representative reflective
areas.
3
Observe the Polished Drain
Check whether the drain surface produces false activation or detection
instability.
4
Test Under Mirror Lighting
Operate permanent mirror or vanity lighting at all normal settings.
5
Apply Approved Cleaning Conditions
Test after normal cleaning without spraying directly into electrical
components.
6
Repeat Hand Detection
Confirm valid activation remains reliable in every tested surface state.
Reflective-Surface Diagnostics
Recognize Reflection-Related Failure Patterns
|
Failure Pattern
|
Probable Reflection Source
|
Recommended Review
|
|
False Activation Only When Basin Is Wet
|
Water film changes optical reflection
|
Review sensor angle and wet-basin field geometry
|
|
False Activation Near Polished Drain
|
Drain reflects transmitted signal
|
Refine detection range or outlet position
|
|
Missed Activation Under Bright Vanity Lighting
|
Glare or sensor saturation
|
Test light angle, intensity and sensor mode
|
|
Instability After Cleaning
|
Cleaner film, droplets or wet sensor window
|
Clean and dry sensor, then repeat test
|
|
Failure Only With Chrome Faucet Installed
|
Faucet body redirects optical signal
|
Review dispenser-faucet spacing and orientation
|
|
Intermittent Detection With Moving Reflections
|
Water, mirrors or moving users alter reflected path
|
Observe field during real user movement
|
Faucet Interaction
Verify the Water Stream Does Not Trigger the Dispenser
The automatic faucet and soap dispenser operate within the same basin zone
and may use related optical technologies. Their detection fields and user
sequences must remain independent.
The faucet water stream, splash pattern, sensor emission or user hand
movement toward the faucet can affect the dispenser if the fixtures are
poorly coordinated.
The dispenser should not activate merely because the faucet turns on, water
moves through the basin or a user rinses hands beneath the faucet outlet.
The faucet should likewise remain stable when soap is dispensed or when the
user presents a hand beneath the soap outlet.
Interaction Sequence
Test the Complete Handwashing Workflow
1
Activate Soap First
Confirm the faucet does not activate from the soap-dispensing movement
unless the hand enters its intended field.
2
Move to the Faucet
Observe whether the soap dispenser reactivates during the natural hand
transition.
3
Run Water at Normal Flow
Confirm the water stream and basin splash do not trigger the dispenser.
4
Move Hands Throughout the Basin
Simulate washing and rinsing without intentionally entering the soap
detection zone.
5
Allow Faucet Shutoff
Observe the dispenser during water deceleration and residual dripping.
6
Repeat With Simultaneous Users
Test adjacent wash stations to evaluate combined faucet and dispenser
activity.
Faucet Coordination
Review Spacing, Sensor Direction and Water Trajectory
Dispenser-to-faucet spacing should provide a clear user sequence and prevent
overlapping detection zones.
The water stream should enter the basin without creating splash that reaches
the dispenser sensor or outlet.
A highly polished faucet positioned directly within the dispenser's optical
path may create reflected signals that change with user movement or water
flow.
Where interaction cannot be corrected through approved calibration, fixture
positioning and mounting geometry should be reviewed.
Lighting Verification
Test Every Permanent Lighting State
Automatic dispensers may be exposed to daylight, ceiling fixtures, mirror
lights, occupancy-controlled lighting and decorative LEDs.
Changes in intensity, angle, flicker or reflected glare can affect some
optical sensors. Electrical switching may also introduce voltage
disturbances or electromagnetic noise.
The dispenser should be tested with each permanent lighting circuit off and
on, including normal dimming levels where installed.
Where daylight reaches the wash station, testing should include the
brightest practical condition available during commissioning or a documented
follow-up test.
Lighting Test Matrix
Optical and Electrical Lighting Conditions
|
Lighting Condition
|
Test Action
|
Required Observation
|
|
Ceiling Lights Off
|
Test standby and valid hand entry
|
Stable detection without missed activation
|
|
Ceiling Lights On
|
Repeat the same hand-entry sequence
|
No change in activation reliability
|
|
Mirror Lights On
|
Observe glare and reflections
|
No false cycling or sensor saturation
|
|
Lights Switched Repeatedly
|
Cycle normal controls
|
No controller reset or unintended pump command
|
|
Dimmed Lighting
|
Test approved dimming range
|
Stable sensor behavior at all normal settings
|
|
Daylight Exposure
|
Test during bright natural light
|
No glare-related misses or false activation
|
|
Emergency Lighting
|
Test alternate lighting mode where practical
|
Dispenser remains functional and stable
|
Environmental Verification
Evaluate Temperature, Humidity, Condensation and Airflow
The installed environment should remain within the operating limits stated
in the product documentation.
Temperature can affect battery output, soap viscosity, pump load and fluid
response. Humidity and condensation can affect connectors, sensor windows
and electronic enclosures.
Strong airflow from hand dryers, supply diffusers or exhaust systems may move
lightweight objects, water droplets or cleaning materials through the
detection field.
Environmental verification should focus on both rated limits and local
conditions inside the vanity or service cabinet.
Environmental Conditions
Commercial Installation Review Matrix
|
Condition
|
Potential Effect
|
Verification Focus
|
|
Low Temperature
|
Higher soap viscosity and reduced battery output
|
Response time, pump sound and delivered dose
|
|
High Temperature
|
Lower viscosity, increased leakage risk and electronic stress
|
Anti-drip behavior and enclosure temperature
|
|
High Humidity
|
Condensation and connector corrosion risk
|
Seals, cable entries and controller mounting
|
|
Condensation
|
Optical distortion or electrical moisture exposure
|
Sensor window and enclosure condition
|
|
Strong Airflow
|
Movement of droplets, cloths or lightweight objects
|
False activation during dryer or HVAC operation
|
|
Dust or Construction Debris
|
Sensor contamination and pump restriction
|
Optical window, reservoir and tubing cleanliness
|
|
Cleaning Chemical Exposure
|
Finish damage, seal degradation or optical residue
|
Approved cleaning method and chemical compatibility
|
Condensation Control
Inspect Hidden Under-Counter Moisture Conditions
The visible restroom may appear dry while condensation develops inside the
vanity around cold-water piping, chilled surfaces or poorly ventilated
enclosures.
Controllers, battery packs and cable connections should remain above
condensation paths and away from surfaces where water droplets collect.
Inspect the cabinet after the faucet has operated and after HVAC conditions
have stabilized. Look for moisture on tubing, plumbing, enclosure surfaces
and cable loops.
Condensation should not be addressed solely by wrapping electronic
components. The source, ventilation and mounting arrangement should be
reviewed.
Cleaning Simulation
Test Normal Maintenance Without Damaging the Sensor
Commercial dispensers are exposed to frequent wiping, spray cleaning and
basin maintenance. The commissioning test should reflect the approved
cleaning procedure.
Cleaning personnel should avoid directing pressurized spray into sensor
openings, cable entries, battery compartments or under-counter electronics.
After cleaning, the sensor window should be free of streaks, residue and
droplets. The dispenser should remain inactive while the detection field is
empty and respond normally to a valid hand entry.
If cleaning activity repeatedly causes false dispensing, the procedure,
detection boundary and fixture location should be reviewed.
High-Traffic Simulation
Observe Sensor Behavior During Repeated User Movement
Airports, healthcare facilities, schools, stadiums and other high-traffic
environments expose fixtures to rapid user turnover and overlapping movement.
The dispenser should recognize each valid user without activating from
people passing behind or beside the wash station.
Testing should include sequential users, adjacent users and temporary
crowding near the counter. The system should maintain stable reset behavior
and avoid unintended repeated cycles.
Record whether performance changes as surrounding activity increases.
Traffic Test
Representative User-Movement Scenarios
Sequential Users
Test repeated users with normal separation between hand entries.
Rapid Turnover
Test the minimum practical interval between separate users.
Adjacent Users
Operate neighboring wash stations at the same time.
Passing Traffic
Walk near the fixture without entering the intended hand zone.
Personal Items
Observe bags, coats and sleeves moving near the counter.
Cleaning Cart
Move representative maintenance equipment past the wash station.
Performance Acceptance
Part 4A Sensor Stability Checklist
No false activation occurs during empty-field observation.
Every valid hand entry is consistently recognized.
Slow, normal and rapid approaches are detected.
Small, large and gloved hands perform acceptably.
Adjacent fixtures do not trigger one another.
Simultaneous operation does not produce cross talk.
Dry and wet basin conditions remain stable.
Polished drains and faucets do not create false cycling.
Faucet water flow does not trigger soap dispensing.
All permanent lighting states have been tested.
Cleaning activity does not create uncontrolled dispensing.
High-traffic movement does not extend the detection field.
Testing Documentation
Record Environmental Triggers and Corrective Actions
|
Record Field
|
Information to Document
|
|
Fixture Identification
|
Building, restroom, basin position and asset number
|
|
False-Activation Result
|
Observation duration, number of events and identified triggers
|
|
Missed-Activation Result
|
Hand profiles, approach directions and number of missed cycles
|
|
Cross-Talk Result
|
Adjacent fixtures tested and simultaneous-use outcome
|
|
Reflective-Surface Result
|
Dry, wet, illuminated and cleaned basin conditions
|
|
Faucet Interaction
|
Water-flow, splash and complete handwashing sequence
|
|
Lighting Conditions
|
Circuits, dimming states, daylight and switching behavior
|
|
Environmental Conditions
|
Temperature, humidity, condensation and airflow observations
|
|
Corrective Action
|
Range, orientation, wiring, programming or layout changes
|
|
Final Retest
|
Pass, fail, date and responsible commissioning technician
|
Part 4A Technical Notice:
Acceptable false-activation rate, missed-activation rate, detection range,
environmental limits and sensor-interference criteria should be established from
the applicable Fontana Soap Dispensers
®
documentation and approved project commissioning requirements. Sensor adjustment
should not be used to conceal incorrect fixture spacing, mounting geometry,
electrical instability or incompatible environmental conditions.
`````html
Power-System Verification
Confirm Reliable Operation Under Actual Electrical Load
Automatic soap dispenser power verification should confirm more than the
presence of voltage. The installed power system must support sensor standby,
controller processing, pump startup, repeated dispensing and simultaneous
operation without excessive voltage drop, reset or intermittent failure.
Battery-operated, hardwired and hybrid systems require different
commissioning procedures. The technician should identify the exact power
architecture before beginning electrical acceptance testing.
Testing should include standby condition, individual pump operation,
repeated cycles, extended inactivity, restored power and combined demand
where several dispensers share a transformer or controller.
Power deficiencies should be corrected before adjusting sensor or dose
settings. Low or unstable voltage can appear to be a sensor, pump or
calibration problem.
Electrical Diagnostic Principle:
Always measure the power source while the pump is operating. Open-circuit
or standby voltage alone does not confirm adequate system capacity.
Electrical Safety
Complete Testing Using Approved Procedures
Power source matches the approved controller rating.
Testing is performed by qualified personnel.
Lockout and isolation procedures are followed where required.
Meter leads and test equipment are suitable for the circuit.
Wet areas are dry before electrical access begins.
Connectors are not disconnected while wet.
Polarity is verified before energization.
Low-voltage conductors are separated from line-voltage wiring.
Transformer and controller enclosures are secured.
Cable entries maintain the required moisture protection.
No exposed conductor or damaged insulation remains.
Final readings are recorded by fixture or circuit.
Battery Verification
Test Battery Condition, Polarity and Loaded Performance
New batteries should be of the approved chemistry, voltage, size and
orientation. Mixed brands, mixed ages or mixed charge conditions should not
be installed in the same battery pack.
Battery contacts should be clean, dry and mechanically secure. Loose springs,
corroded terminals or incomplete battery seating can produce intermittent
controller resets during pump startup.
The technician should measure battery-pack voltage at standby and during a
dispensing cycle. A substantial drop under load may indicate weak batteries,
high contact resistance or an excessive pump load.
Battery commissioning should also confirm correct low-battery indication,
accessible replacement and secure enclosure closure.
Battery Procedure
Recommended Battery Acceptance Sequence
1
Confirm Approved Battery Type
Verify chemistry, nominal voltage, quantity and orientation against the
product documentation.
2
Inspect the Battery Compartment
Check contacts, wiring, seals, polarity markings and enclosure condition.
3
Measure Standby Voltage
Record the battery-pack voltage after the controller completes startup.
4
Measure Loaded Voltage
Record the minimum voltage observed while the pump is dispensing soap.
5
Perform Repeated Cycles
Confirm that voltage and controller operation remain stable through
multiple pump starts.
6
Verify Low-Battery Reporting
Confirm the model-specific indicator or diagnostic function using the
approved procedure.
7
Secure the Battery Enclosure
Close all covers, seals and mounting hardware before returning the
dispenser to service.
Battery Diagnostics
Recognize Power-Related Failure Patterns
|
Observed Condition
|
Possible Cause
|
Corrective Action
|
|
Normal Standby but Reset During Pumping
|
Loaded voltage drop or high contact resistance
|
Test batteries under load and inspect terminals
|
|
Weak or Slow Pump Operation
|
Low battery condition or excessive fluid resistance
|
Verify voltage, soap viscosity and tubing restriction
|
|
Intermittent Power When Cabinet Is Moved
|
Loose battery contact or damaged cable
|
Secure contacts and replace damaged components
|
|
Low-Battery Indicator With New Batteries
|
Incorrect chemistry, reversed cell or contact resistance
|
Confirm approved batteries and orientation
|
|
Short Battery Service Life
|
False activations, excessive dose or high pump load
|
Review activation count, dose and mechanical condition
|
|
Battery Compartment Moisture
|
Condensation, leaking soap or failed enclosure seal
|
Remove power, dry enclosure and correct moisture source
|
|
Corroded Terminals
|
Moisture exposure or battery leakage
|
Replace damaged components and inspect enclosure
|
Battery Accessibility
Verify Replacement Without Disturbing the Installation
Battery replacement should be possible without removing the dispenser,
disassembling unrelated plumbing or placing the technician in contact with
active leaks.
The battery pack should be labeled and reachable from the intended service
position. Cable length should permit access without pulling on the
controller connection.
Where the battery compartment is located beneath a counter, the technician
should confirm that doors, drawers, waste piping and reservoir components do
not block removal.
Final commissioning records should identify the battery type and service
location for facility personnel.
Hardwired Power
Verify Transformer Output and Circuit Stability
Hardwired soap dispenser systems typically use a listed transformer or
approved low-voltage power supply. The installed output must match the
controller's required voltage, polarity and current capacity.
The transformer should be installed in an accessible, dry and code-compliant
location. Low-voltage wiring should be protected from abrasion, moisture and
interference from line-voltage conductors.
Commissioning should include supply-side confirmation, low-voltage output
measurement, loaded voltage testing and verification of all dispensers served
by the circuit.
If several fixtures share one transformer, simultaneous operation must be
tested to confirm adequate current capacity and conductor sizing.
Hardwired Procedure
Recommended AC and Low-Voltage Verification Sequence
1
Identify the Serving Circuit
Confirm panel, circuit, transformer and all dispensers connected to the
power source.
2
Inspect the Transformer Installation
Check accessibility, enclosure, mounting, ventilation and conductor
protection.
3
Verify Primary Supply
Confirm the transformer receives the approved line voltage using safe
electrical procedures.
4
Measure Secondary Output
Record low-voltage output at the transformer and at the remote
controller connection.
5
Measure Loaded Voltage
Operate the pump and record the minimum voltage at the controller.
6
Test Simultaneous Demand
Operate multiple connected dispensers together and monitor voltage and
controller stability.
7
Verify Power Restoration
Interrupt and restore power using the approved procedure, then confirm
normal reinitialization.
Voltage Drop
Compare Transformer Output With Controller Input
Voltage should be measured at both the source and the connected controller.
A satisfactory transformer reading does not confirm acceptable voltage at a
distant fixture.
Long conductor runs, undersized wiring, loose splices, damaged connectors or
shared loads can reduce the voltage available to the pump.
Measure the source and remote points under the same operating condition. A
significant difference identifies distribution loss rather than transformer
failure.
Correct conductor, splice and connector deficiencies before increasing power
supply capacity.
Useful Comparison:
Record transformer standby voltage, controller standby voltage, transformer
loaded voltage and controller loaded voltage during the same pump cycle.
Hardwired Diagnostics
Electrical Failure and Corrective-Action Matrix
|
Observed Condition
|
Possible Cause
|
Recommended Verification
|
|
No Transformer Output
|
No primary power, failed transformer or open protection
|
Verify primary circuit and transformer condition
|
|
Correct Source Voltage but Low Controller Voltage
|
Conductor loss, loose splice or damaged connector
|
Measure voltage along the distribution path
|
|
Voltage Falls During Simultaneous Use
|
Insufficient supply capacity or excessive shared load
|
Compare connected load with approved power rating
|
|
Controller Resets When Lights Switch
|
Shared circuit disturbance or electrical noise
|
Monitor input during lighting operation
|
|
Intermittent Operation at One Fixture
|
Local connection or wiring defect
|
Compare with other fixtures on the same supply
|
|
All Fixtures Fail Together
|
Central transformer, circuit or controller failure
|
Inspect shared components before individual dispensers
|
|
Transformer Overheating
|
Overload, ventilation deficiency or internal fault
|
Remove load and verify rating and installation
|
Power Interruption
Verify Controlled Shutdown and Normal Restart
The dispenser should return to a predictable state after loss and restoration
of power. The controller should not initiate uncontrolled pumping or lose
required settings unless documented by the manufacturer.
Before interrupting power, ensure the detection zone is clear and the soap
system is stable. Restore power and observe initialization, indicators and
pump behavior.
After restart, verify sensor range, dose, time-to-soap and reset behavior.
Some systems may require a defined relearning period.
Where central power serves multiple dispensers, observe whether all units
restart simultaneously without overloading the supply.
Restart Procedure
Power-Loss Recovery Test
1
Record Normal Operating State
Document controller indication, sensor setting and dose setting before
power interruption.
2
Clear the Detection Zone
Remove all users and objects from beneath the outlet.
3
Interrupt the Approved Power Source
Use the designated disconnect, battery connector or circuit-control
procedure.
4
Allow Complete Shutdown
Wait for indicators and stored electrical energy to clear where
applicable.
5
Restore Power
Observe initialization without placing a hand in the sensor field.
6
Verify Stored Settings
Confirm the approved sensor, dose and reset settings remain active.
7
Perform Functional Retest
Confirm one valid hand entry produces one complete dose.
Hybrid and Backup Power
Verify Automatic Transition Between Power Sources
Hybrid systems may use hardwired primary power with battery backup or another
approved secondary source. Both sources and the transition logic should be
tested.
The dispenser should remain functional or recover according to the specified
sequence when the primary supply is removed.
Testing should confirm that the backup source is connected, charged or
installed correctly and capable of operating the pump under load.
When primary power returns, the controller should transition without
uncontrolled dispensing, repeated reset or loss of calibration.
Backup Verification
Primary and Secondary Power Test Matrix
|
Test Condition
|
Required Observation
|
Record
|
|
Primary Power Normal
|
Controller and pump operate from the primary source
|
Standby and loaded voltage
|
|
Primary Power Removed
|
System transfers or shuts down as designed
|
Transition time and indicator behavior
|
|
Backup Operation
|
Valid hand entry produces a complete dose
|
Loaded backup voltage and dose result
|
|
Repeated Backup Cycles
|
No reset, weak pumping or unstable sensor operation
|
Number of successful cycles
|
|
Primary Power Restored
|
System returns to primary supply without false activation
|
Indicator and restart result
|
|
Stored Settings After Transition
|
Sensor and dose settings remain correct
|
Program verification
|
MultiFeed Performance
Verify the Central Soap System as a Complete Network
A Fontana MultiFeed
®
system should be commissioned as an integrated fluid-delivery network rather
than as a group of independent dispensers.
Testing should confirm central reservoir function, pump performance, main
line stability, branch delivery, simultaneous demand, outlet consistency and
recovery after refill or service.
The longest, highest, nearest and most remote outlets should be included in
the commissioning sample. Individual branches may behave differently even
when the outlets use the same programmed settings.
All branch fittings, valves, connectors and concealed routing should remain
leak-free during both isolated and combined operation.
MultiFeed Readiness
Central-System Preconditions
Central reservoir is filled with approved soap.
Main supply line is fully primed.
Every branch has been individually primed.
Branch identification matches project drawings.
Central pump direction and mounting are correct.
Reservoir venting is unobstructed.
Isolation valves are in the approved operating position.
No branch tubing is kinked or compressed.
All central and branch connections remain dry.
Power supply supports the connected central load.
Individual dispenser sensors are calibrated.
Commissioning data can be recorded by outlet.
Branch Verification
Test Every Outlet Individually Before Combined Demand
Each outlet should first be tested independently. Confirm detection,
time-to-soap, dose, reset, anti-drip behavior and branch fluid stability.
An outlet that performs poorly during isolated operation should be corrected
before simultaneous-demand testing begins.
Record branch length, elevation, final dose and response where these values
are part of the approved commissioning documentation.
Recurring air, slow recovery or declining dose may indicate a suction leak,
branch restriction or inadequate central pressure.
Branch Sample
Representative MultiFeed Outlet Selection
Nearest Outlet
Verifies performance at the branch with the lowest expected
distribution resistance.
Most Remote Outlet
Tests the longest total soap-delivery path from the central
reservoir.
Highest Outlet
Evaluates the branch with the greatest vertical lift.
Lowest Outlet
Checks for gravity-assisted overdelivery, siphoning or dripping.
Longest Branch
Verifies response and dose under the greatest branch tubing volume.
Typical Outlet
Provides a representative baseline for the majority of wash
stations.
Simultaneous Demand
Verify Performance When Multiple Users Dispense Soap
Central and shared systems should be tested under simultaneous activation
because combined demand may reveal pressure, voltage or controller
limitations not visible during single-outlet operation.
The test should begin with two representative outlets and increase according
to the project commissioning plan.
Observe time-to-soap, delivered dose, pump sound, loaded voltage, branch
stability and recovery after the combined event.
No outlet should lose prime, produce an incomplete dose or require repeated
hand entry because another dispenser is operating.
Demand Procedure
Progressive Multi-Outlet Testing Sequence
1
Establish Individual Baselines
Record dose and response for each selected outlet operating alone.
2
Activate Two Outlets Together
Select outlets with different branch lengths or elevations.
3
Compare With Baseline
Measure changes in response, quantity and pump behavior.
4
Increase the Number of Active Outlets
Progress to the project-defined simultaneous demand condition.
5
Monitor Power and Fluid Delivery
Record central pump load, controller state and voltage where applicable.
6
Observe System Recovery
Confirm every outlet returns to normal standby and retains prime.
7
Retest the Most Remote Outlet
Verify that performance remains acceptable immediately after peak demand.
Demand Diagnostics
Simultaneous-Operation Troubleshooting Matrix
|
Observed Condition
|
Possible Cause
|
Corrective Direction
|
|
All Outlets Deliver Reduced Dose
|
Insufficient central pump capacity or power
|
Verify system design, loaded voltage and pump performance
|
|
Remote Outlet Responds Slowly
|
Branch length, air, restriction or pressure imbalance
|
Inspect and rebalance the affected branch
|
|
One Branch Loses Prime
|
Air leak, check-valve defect or poor routing
|
Inspect branch sealing and fluid retention
|
|
Central Controller Resets
|
Voltage drop or demand above approved electrical capacity
|
Measure loaded supply during peak operation
|
|
Low Outlet Drips After Combined Use
|
Gravity head, siphoning or valve leakage
|
Review elevation, check valves and branch pressure
|
|
Pump Sound Changes Under Demand
|
Cavitation, restriction, reservoir venting or overload
|
Inspect soap supply and pump operating condition
|
|
Dose Becomes Inconsistent After Peak Use
|
Air entry, pump heating or unstable pressure
|
Allow recovery, inspect system and repeat the test
|
Reservoir-Level Testing
Verify Performance at Normal and Low Soap Levels
A central or individual reservoir may perform differently as the soap level
drops. Pickup depth, suction head, venting and air-entry risk can change near
the refill point.
Commissioning should verify performance at the normal operating level and,
where practical, near the specified low-level condition.
The system should not draw air prematurely or require complete reservoir
emptying before a low-level condition is identified.
Where a level sensor, alarm or building-management signal is provided, test
the indication using the approved procedure.
Low-Level Verification
Reservoir and Alarm Acceptance Matrix
|
Test Condition
|
Required Result
|
Potential Defect
|
|
Normal Fill Level
|
Stable prime, dose and response
|
General fluid or pump deficiency
|
|
Reduced Fill Level
|
Pickup remains submerged and outlet output remains stable
|
Pickup too short or reservoir geometry problem
|
|
Low-Level Threshold
|
Indicator or alarm activates at the approved level
|
Level sensor position or programming error
|
|
Refill Condition
|
Alarm clears and system remains primed
|
Reset failure or air introduction during refill
|
|
Near-Empty Operation
|
No uncontrolled air ingestion before the intended refill point
|
Pickup, venting or reservoir design issue
|
|
Central Notification
|
Remote signal matches local condition where provided
|
Communication or wiring failure
|
Endurance Verification
Test Repeated Operation Beyond a Single Functional Cycle
Initial acceptance should include a defined repeated-cycle test to identify
intermittent electrical, mechanical or fluid-delivery problems.
The required cycle count should be established by the project commissioning
plan, facility risk level and model-specific documentation.
During testing, observe sensor recognition, pump sound, loaded voltage, dose,
time-to-soap, tubing movement, leakage and controller temperature.
The system should maintain stable performance without progressive decline,
overheating, air entry or uncontrolled dispensing.
Endurance Procedure
Repeated-Cycle Test Sequence
1
Record the Starting Baseline
Measure dose, response, voltage and reservoir level before the test.
2
Perform the Defined Cycle Count
Use normal reset intervals and the approved duty cycle.
3
Observe Intermediate Performance
Inspect output, sound, voltage and leakage at defined intervals.
4
Check for Pump Heating
Confirm the pump and controller remain within normal operating
conditions.
5
Inspect the Fluid Path
Look for recurring bubbles, collapsing tubing, connector movement or
leakage.
6
Record the Final Baseline
Repeat dose, response and voltage measurements after the final cycle.
7
Complete Idle Recovery Testing
Allow a defined rest period and verify the next first-use cycle.
Endurance Evaluation
Compare Starting and Final Performance
|
Performance Item
|
Starting Measurement
|
Final Measurement
|
Acceptance Review
|
|
Average Dose
|
Record measured baseline
|
Record after repeated cycles
|
No unacceptable change or instability
|
|
Time-to-Soap
|
Record average and maximum
|
Repeat after endurance test
|
No progressive delay
|
|
Loaded Voltage
|
Record during initial pump cycle
|
Record during final pump cycle
|
Remains within approved range
|
|
Pump Sound
|
Normal baseline description
|
Final operating description
|
No cavitation, grinding or unstable tone
|
|
Leak Condition
|
All joints dry
|
Reinspect after cycling
|
No new leakage or connector movement
|
|
Air in Tubing
|
Line fully primed
|
Observe final fluid path
|
No recurring air entry
|
|
Reset Reliability
|
One entry produces one cycle
|
Verify throughout and after test
|
No missed or double cycles
|
Failure Recovery
Verify the System Returns to Service After Common Events
Commercial commissioning should include controlled recovery from common
service events such as reservoir refill, battery replacement, power
interruption and temporary branch isolation.
The objective is to confirm that facility personnel can restore normal
operation without unnecessary disassembly or repeated manual priming.
Each recovery test should follow the approved maintenance procedure and
should not intentionally damage seals, run pumps dry or introduce
incompatible materials.
Record whether calibration settings, prime and fault indicators return to
the expected state.
Recovery Matrix
Service-Event Verification
|
Service Event
|
Required Recovery
|
Verification
|
|
Reservoir Refill
|
System remains primed or reprimes using the approved procedure
|
Complete first dose after refill
|
|
Battery Replacement
|
Controller restarts without loss of required settings
|
Sensor, dose and loaded-voltage test
|
|
Primary Power Interruption
|
Normal shutdown and restart
|
No uncontrolled pump operation
|
|
Branch Isolation
|
Remaining branches continue operating normally
|
Test representative connected outlets
|
|
Branch Reopening
|
Affected branch returns without introducing system-wide air
|
Prime and leak inspection
|
|
Controller Reset
|
System returns to approved calibration
|
Verify stored or restored settings
|
|
Low-Level Alarm Clearance
|
Alarm clears after approved refill
|
Local and remote indication test
|
System Acceptance
Part 4B Power and MultiFeed Checklist
Battery type and polarity match the approved documentation.
Battery standby and loaded voltage are acceptable.
Battery enclosure is dry, secure and accessible.
Transformer output matches the controller requirement.
Controller voltage remains stable during pump operation.
Shared power supports simultaneous fixture demand.
Power restoration does not cause uncontrolled dispensing.
Hybrid power transitions correctly between sources.
Every MultiFeed branch operates correctly in isolation.
Remote and elevated outlets meet performance requirements.
Simultaneous outlet use does not cause unacceptable dose loss.
No branch loses prime during combined demand.
Low-level indication operates at the approved threshold.
Repeated-cycle performance remains stable.
No leakage develops during endurance testing.
Service-event recovery has been documented.
Commissioning Records
Power and MultiFeed Performance Data Sheet
|
Record Field
|
Required Information
|
|
Power Architecture
|
Battery, hardwired, hybrid, central or shared power arrangement
|
|
Battery Information
|
Type, quantity, installation date, standby voltage and loaded voltage
|
|
Transformer Information
|
Manufacturer, model, rating, primary supply and secondary output
|
|
Remote Voltage
|
Controller standby and loaded voltage at representative fixtures
|
|
Power-Loss Result
|
Shutdown, restoration, initialization and setting retention
|
|
Backup-Power Result
|
Transition behavior, loaded backup voltage and operating result
|
|
MultiFeed Configuration
|
Reservoir, pump, controller, main-line and branch identification
|
|
Individual Branch Results
|
Dose, time-to-soap, prime condition and leak status by outlet
|
|
Simultaneous-Demand Result
|
Number of outlets, measured performance and system stability
|
|
Low-Level Verification
|
Alarm threshold, local indication and remote notification result
|
|
Endurance Test
|
Cycle count, starting baseline, final baseline and deficiencies
|
|
Corrective Actions
|
Electrical, hydraulic, branch, pump or controller corrections
|
|
Final Acceptance
|
Pass, fail, date, technician and approving representative
|
Part 4 Completion Gate
Conditions Required Before Facility-Specific Acceptance
Part 4 is complete only when sensor stability, power performance, MultiFeed
operation, simultaneous demand and repeated-cycle reliability have been
verified under the final installed conditions.
Any unresolved false activation, missed activation, electrical reset,
branch imbalance, loss of prime or uncontrolled dripping should remain open
as a commissioning deficiency.
Facility-specific acceptance testing for healthcare, hospitality, airport,
education and other commercial applications should begin only after the core
system passes this technical gate.
Proceed to Part 5 Only After Technical Stability Is Confirmed:
The final section will address application-specific commissioning,
acceptance testing, preventive maintenance baselines, troubleshooting,
documentation, professional checklists, FAQs and engineering summary.
Part 4B Technical Notice:
Acceptable battery voltage, transformer output, loaded voltage, simultaneous
demand, endurance cycle count, branch variation and low-level alarm settings
depend on the applicable Fontana Soap Dispensers
®
and Fontana MultiFeed®
technical documentation. Electrical testing should be performed by qualified
personnel using approved procedures. Do not increase transformer capacity,
modify wiring, alter pump duty cycle or substitute battery chemistry without
engineering approval.
``````html
Facility Commissioning
Verify Performance for the Intended Building Environment
Final commissioning should reflect the actual operating conditions of the
facility. Healthcare projects should verify reliable hand-hygiene access,
controlled dispensing, cleaning compatibility and service procedures.
Hospitality projects should confirm quiet operation, finish protection,
consistent dosing and convenient housekeeping access.
Airports, schools, stadiums, offices and other high-traffic buildings should
include repeated-use testing, simultaneous fixture operation, rapid user
turnover and maintenance-access verification.
Final Acceptance
Commercial Soap Dispenser Acceptance Checklist
Fixture is secure, aligned and undamaged.
Approved soap is installed and fully primed.
One valid hand entry produces one complete dose.
No false, missed or repeated activation occurs.
Power remains stable during pump operation.
Tubing, fittings and reservoirs remain leak-free.
MultiFeed branches perform consistently.
Cleaning and refill access are unobstructed.
Commissioning results are recorded by fixture.
Facility personnel receive operating instructions.
Maintenance Baseline
Establish Preventive Maintenance Before Turnover
| Interval |
Recommended Review |
| Daily |
Check soap level, outlet cleanliness and visible leakage. |
| Weekly |
Clean sensor window and verify normal activation. |
| Monthly |
Inspect tubing, connectors, battery status and reservoir condition. |
| Quarterly |
Measure dose consistency and review false-activation history. |
| Annually |
Recommission power, sensor, pump and MultiFeed performance. |
Troubleshooting
Correct the Root Cause Before Recalibration
No dispensing may indicate loss of power, empty reservoir, air in the tubing,
pump failure or sensor disconnection. Slow delivery may indicate high soap
viscosity, restricted tubing, low voltage or incomplete priming. Repeated
dispensing may indicate excessive sensor range, reflective interference or
incomplete reset.
After any pump, controller, sensor, power or tubing repair, repeat the
applicable commissioning tests before returning the fixture to service.
Engineering Summary
Installation Quality Determines Long-Term Performance
Reliable commercial soap dispensing depends on coordinated mounting,
accessible service zones, stable power, compatible soap, sealed tubing,
controlled sensor geometry and documented commissioning.
Final acceptance should confirm that every fixture performs consistently
under realistic user, lighting, cleaning, electrical and environmental
conditions. Accurate records provide the maintenance baseline needed for
efficient troubleshooting, lifecycle planning and future recommissioning.
Final Technical Notice:
Product-specific installation limits, electrical ratings, soap compatibility,
dose settings and maintenance requirements should always be verified using the
applicable Fontana Soap Dispensers®
technical documentation and approved project specifications.
```
|
|
Engineering Reference Library
Technical reference pages developed for architects, plumbing engineers, contractors, facility managers and commercial specification teams.
|
Engineering Resource
|
Technical Focus
|
Resource
|
|
Commercial Automatic Soap Dispenser Engineering Guide
|
Design, performance and long-term serviceability
|
Read Guide
|
|
Dispensing Cycle Life and Accuracy Testing
|
Endurance, output accuracy and dosing repeatability
|
Read Guide
|
|
Soap Pump, Viscosity and Dose-Control Engineering
|
Pump selection, viscosity and calibrated soap delivery
|
Read Guide
|
|
High-Traffic Usage, Maintenance and Lifecycle Planning
|
Traffic demand, maintenance and lifecycle cost planning
|
Read Guide
|
|
MultiFeed, Power and Smart System Integration
|
Centralized supply, power architecture and smart controls
|
Read Guide
|
|
Commercial Automatic Soap Dispenser Specification & Selection Guide
|
Product selection, specifications and compliance coordination
|
Read Guide
|
|
Automatic Soap Dispenser Sensor Technology & Activation Engineering
|
Sensor detection, response stability and false-activation control
|
Read Guide
|
|
Commercial Soap Dispenser Installation, Commissioning & Performance Verification
|
Installation, commissioning and final performance verification
|
Read Guide
|
```
INSTALLATION AND COMMISSIONING ENGINEERING
Installation, Startup and Verification Resources
Continue the technical review with resources covering rough-in coordination, mounting geometry, tubing installation, soap compatibility, power verification, priming, sensor calibration, dose testing, MultiFeed balancing, troubleshooting and facility handoff.
Commercial Soap Dispensers
Installation is complete only after documented performance verification.
Installation Planning Resources
Coordinate the dispenser outlet, basin, countertop, concealed components, power supply and maintenance area before fabrication or wall closure.
Startup, Priming and Calibration
Use these resources to verify the fluid path, approved soap formulation, sensor field, pump output and system response under final installed conditions.
Troubleshooting and Facility Handoff
Provide facility personnel with final settings, approved soap information, replacement-part references and diagnostic procedures before project acceptance.
Final Commissioning Checklist
Verify each dispenser under final lighting, power, soap, basin and operating conditions before project acceptance.
|
Verification Item
|
Required Test
|
Acceptance Objective
|
|
Model Verification
|
Confirm model, finish, power, pump and reservoir against approved submittals
|
Prevents commissioning of substituted or incomplete equipment.
|
|
Mounting Position
|
Check alignment, rigidity, rotation, projection and basin coverage
|
Ensures soap enters the usable basin area.
|
|
Fluid Path
|
Inspect tubing size, routing, support, bend radius and connector engagement
|
Prevents air entry, restricted flow and concealed leakage.
|
|
Reservoir
|
Verify support, approved soap, refill access, labeling and spill protection
|
Supports controlled refilling and reliable pump supply.
|
|
Priming
|
Remove trapped air and confirm continuous soap at the outlet
|
Establishes a complete and stable fluid column.
|
|
Sensor Field
|
Test hand detection, basin reflections, faucet flow and permanent lighting
|
Confirms intentional activation without false triggering.
|
|
Dose Output
|
Measure repeated dispensing cycles using the approved soap
|
Establishes repeatable calibrated delivery.
|
|
Reset and Anti-Drip
|
Confirm one activation produces one cycle without continued flow
|
Reduces soap waste and countertop residue.
|
|
Loaded Power
|
Measure voltage while the pump operates and test backup transfer
|
Confirms stable operation under actual electrical load.
|
|
MultiFeed Branches
|
Test the nearest, farthest, highest and most demanding outlets
|
Verifies branch response and balanced soap delivery.
|
|
Service Access
|
Confirm pumps, batteries, controllers, tubing and reservoirs are removable
|
Prevents destructive or obstructed future maintenance.
|
|
Documentation
|
Record settings, results, model numbers, soap type and replacement parts
|
Creates an operating baseline for facility personnel.
|
Verify the Installed System
Confirm installation geometry, approved soap, priming, dose output, activation stability, loaded power, anti-drip performance, service access and final documentation before project acceptance.
Selection Guide
Troubleshooting
```
|
|
|